Android
Scales
The app’s approach to scales is very similar to the chord’s one. You select a scale and the app tells you information about it and shows you how to play it.
Selecting and viewing a scale
To select a scale, simply tap the button of the Scales section of the home page.
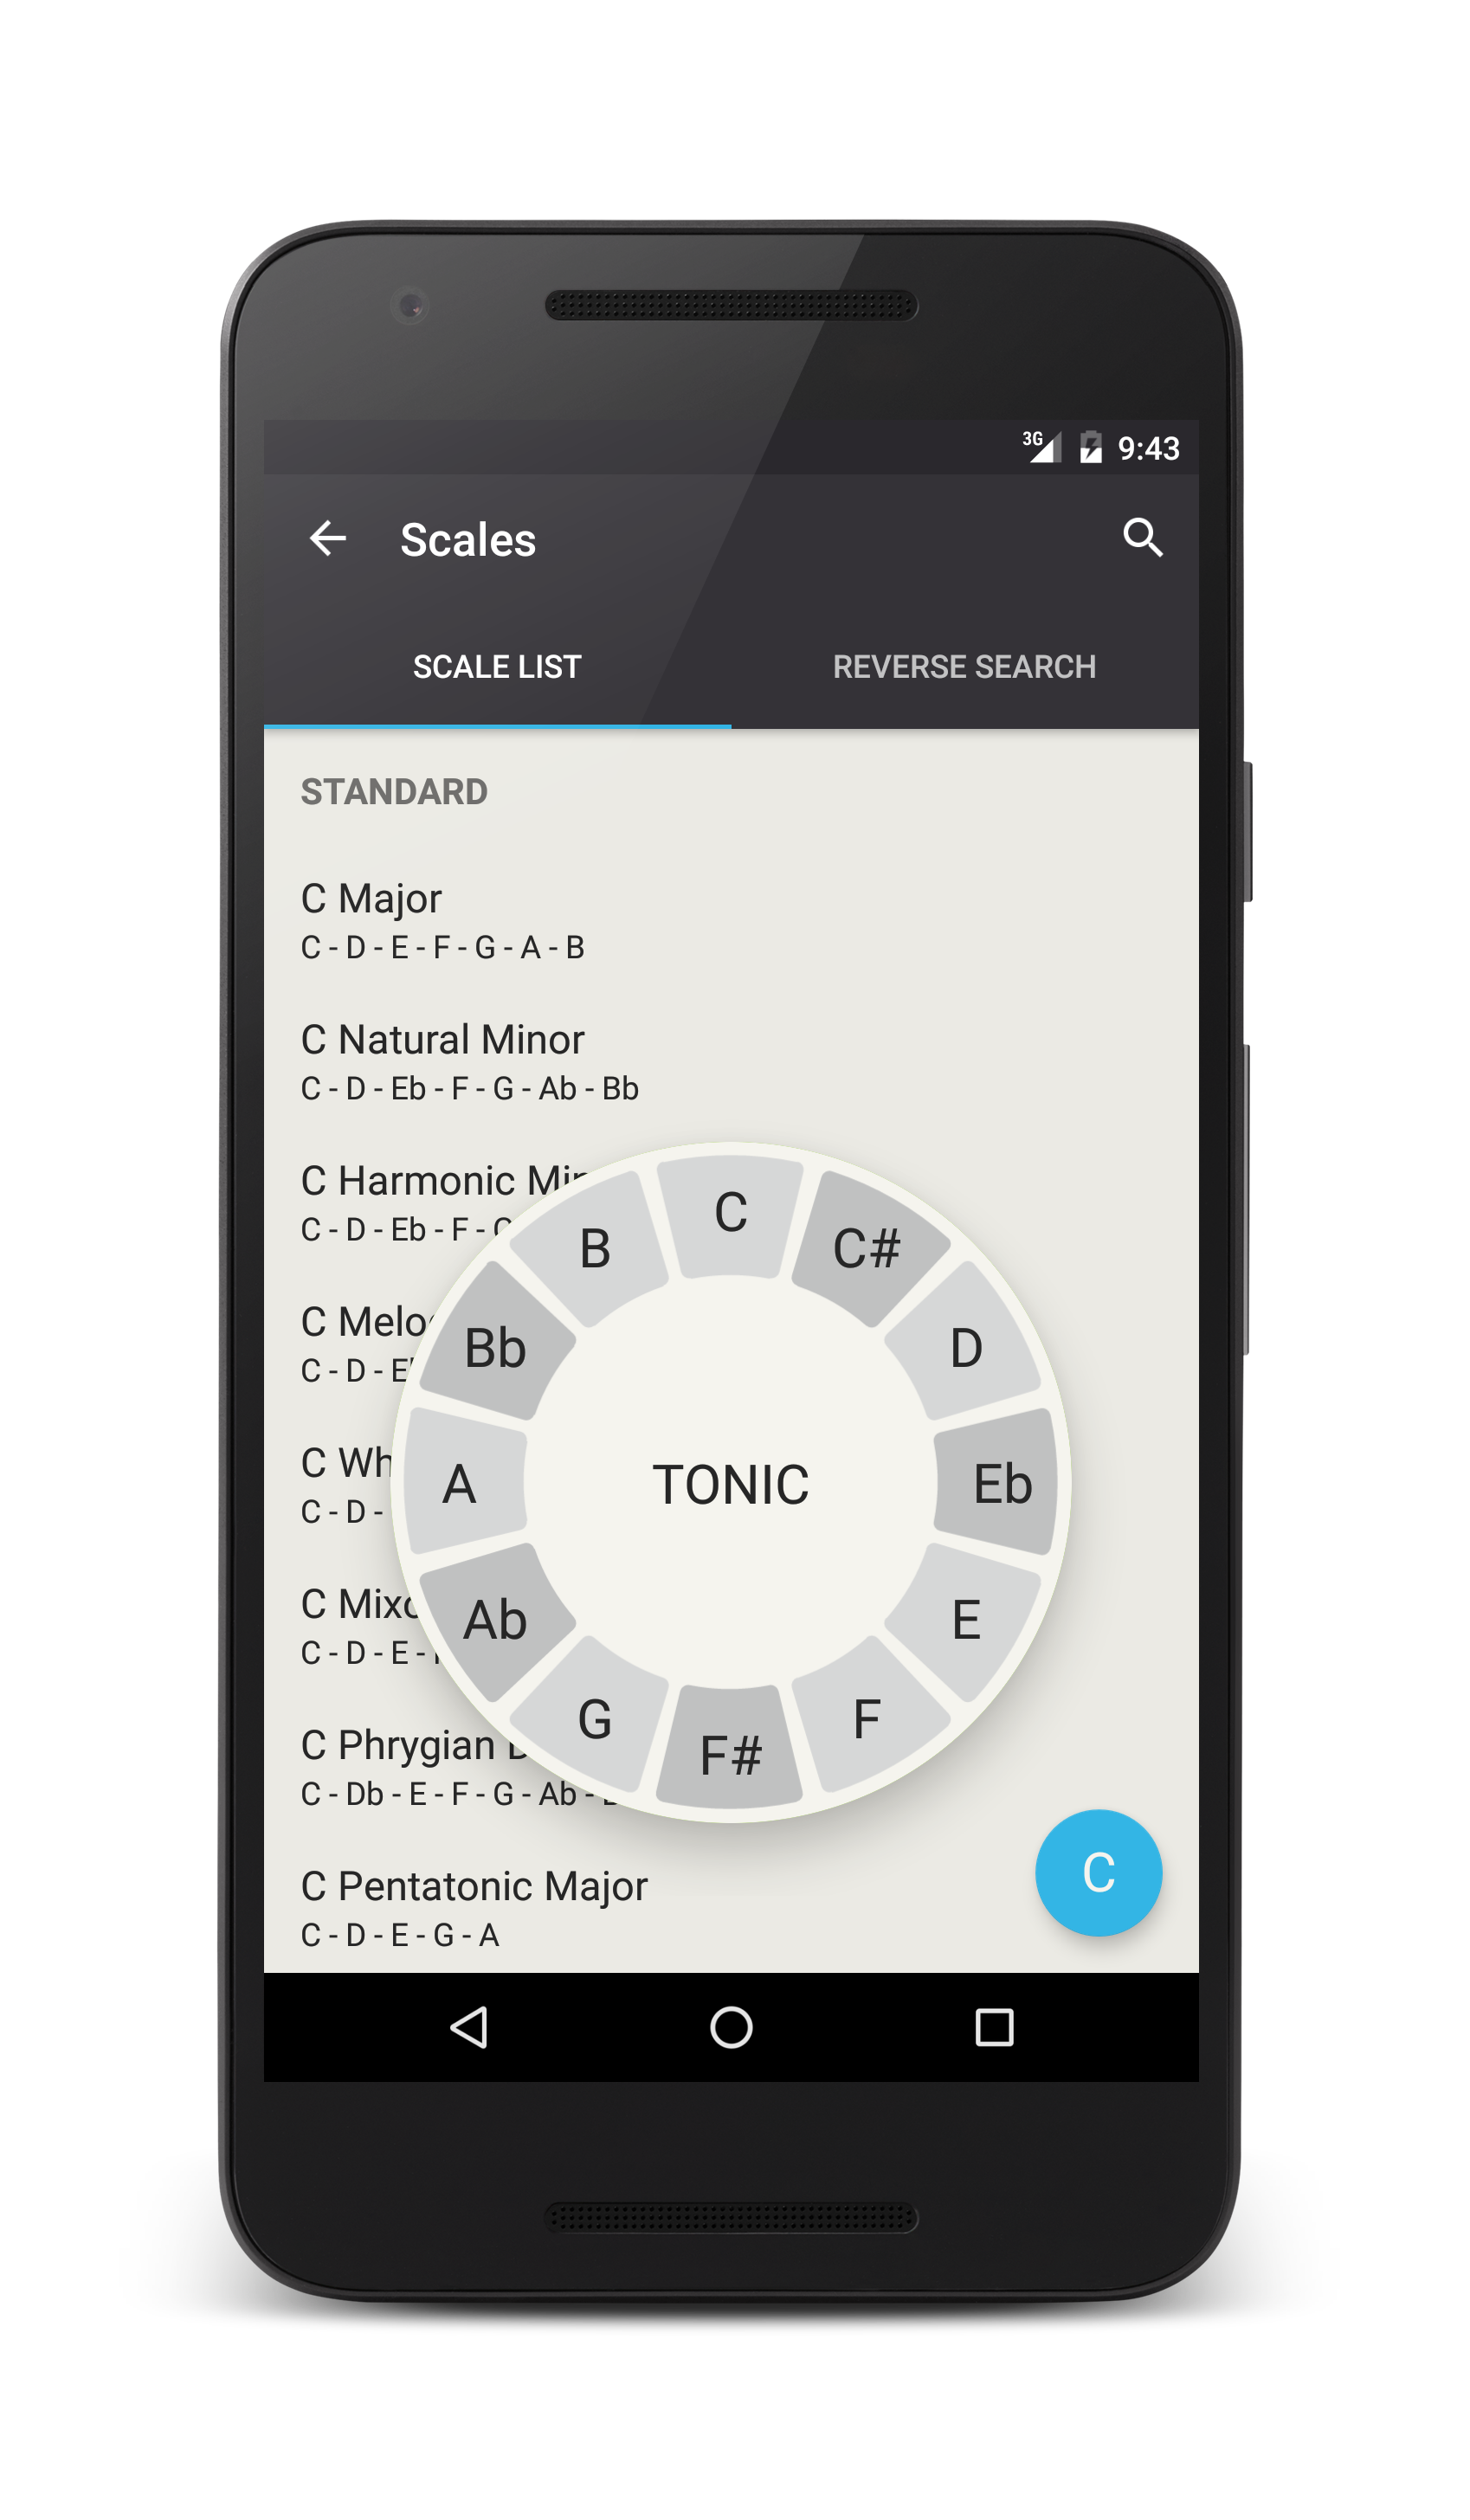
The main mode is to select a scale from the main list of more than 350 scales. You have to specify a tonic (this note plays the same role as the root of chords) and this is done by tapping the Tonic button at the bottom of the screen.
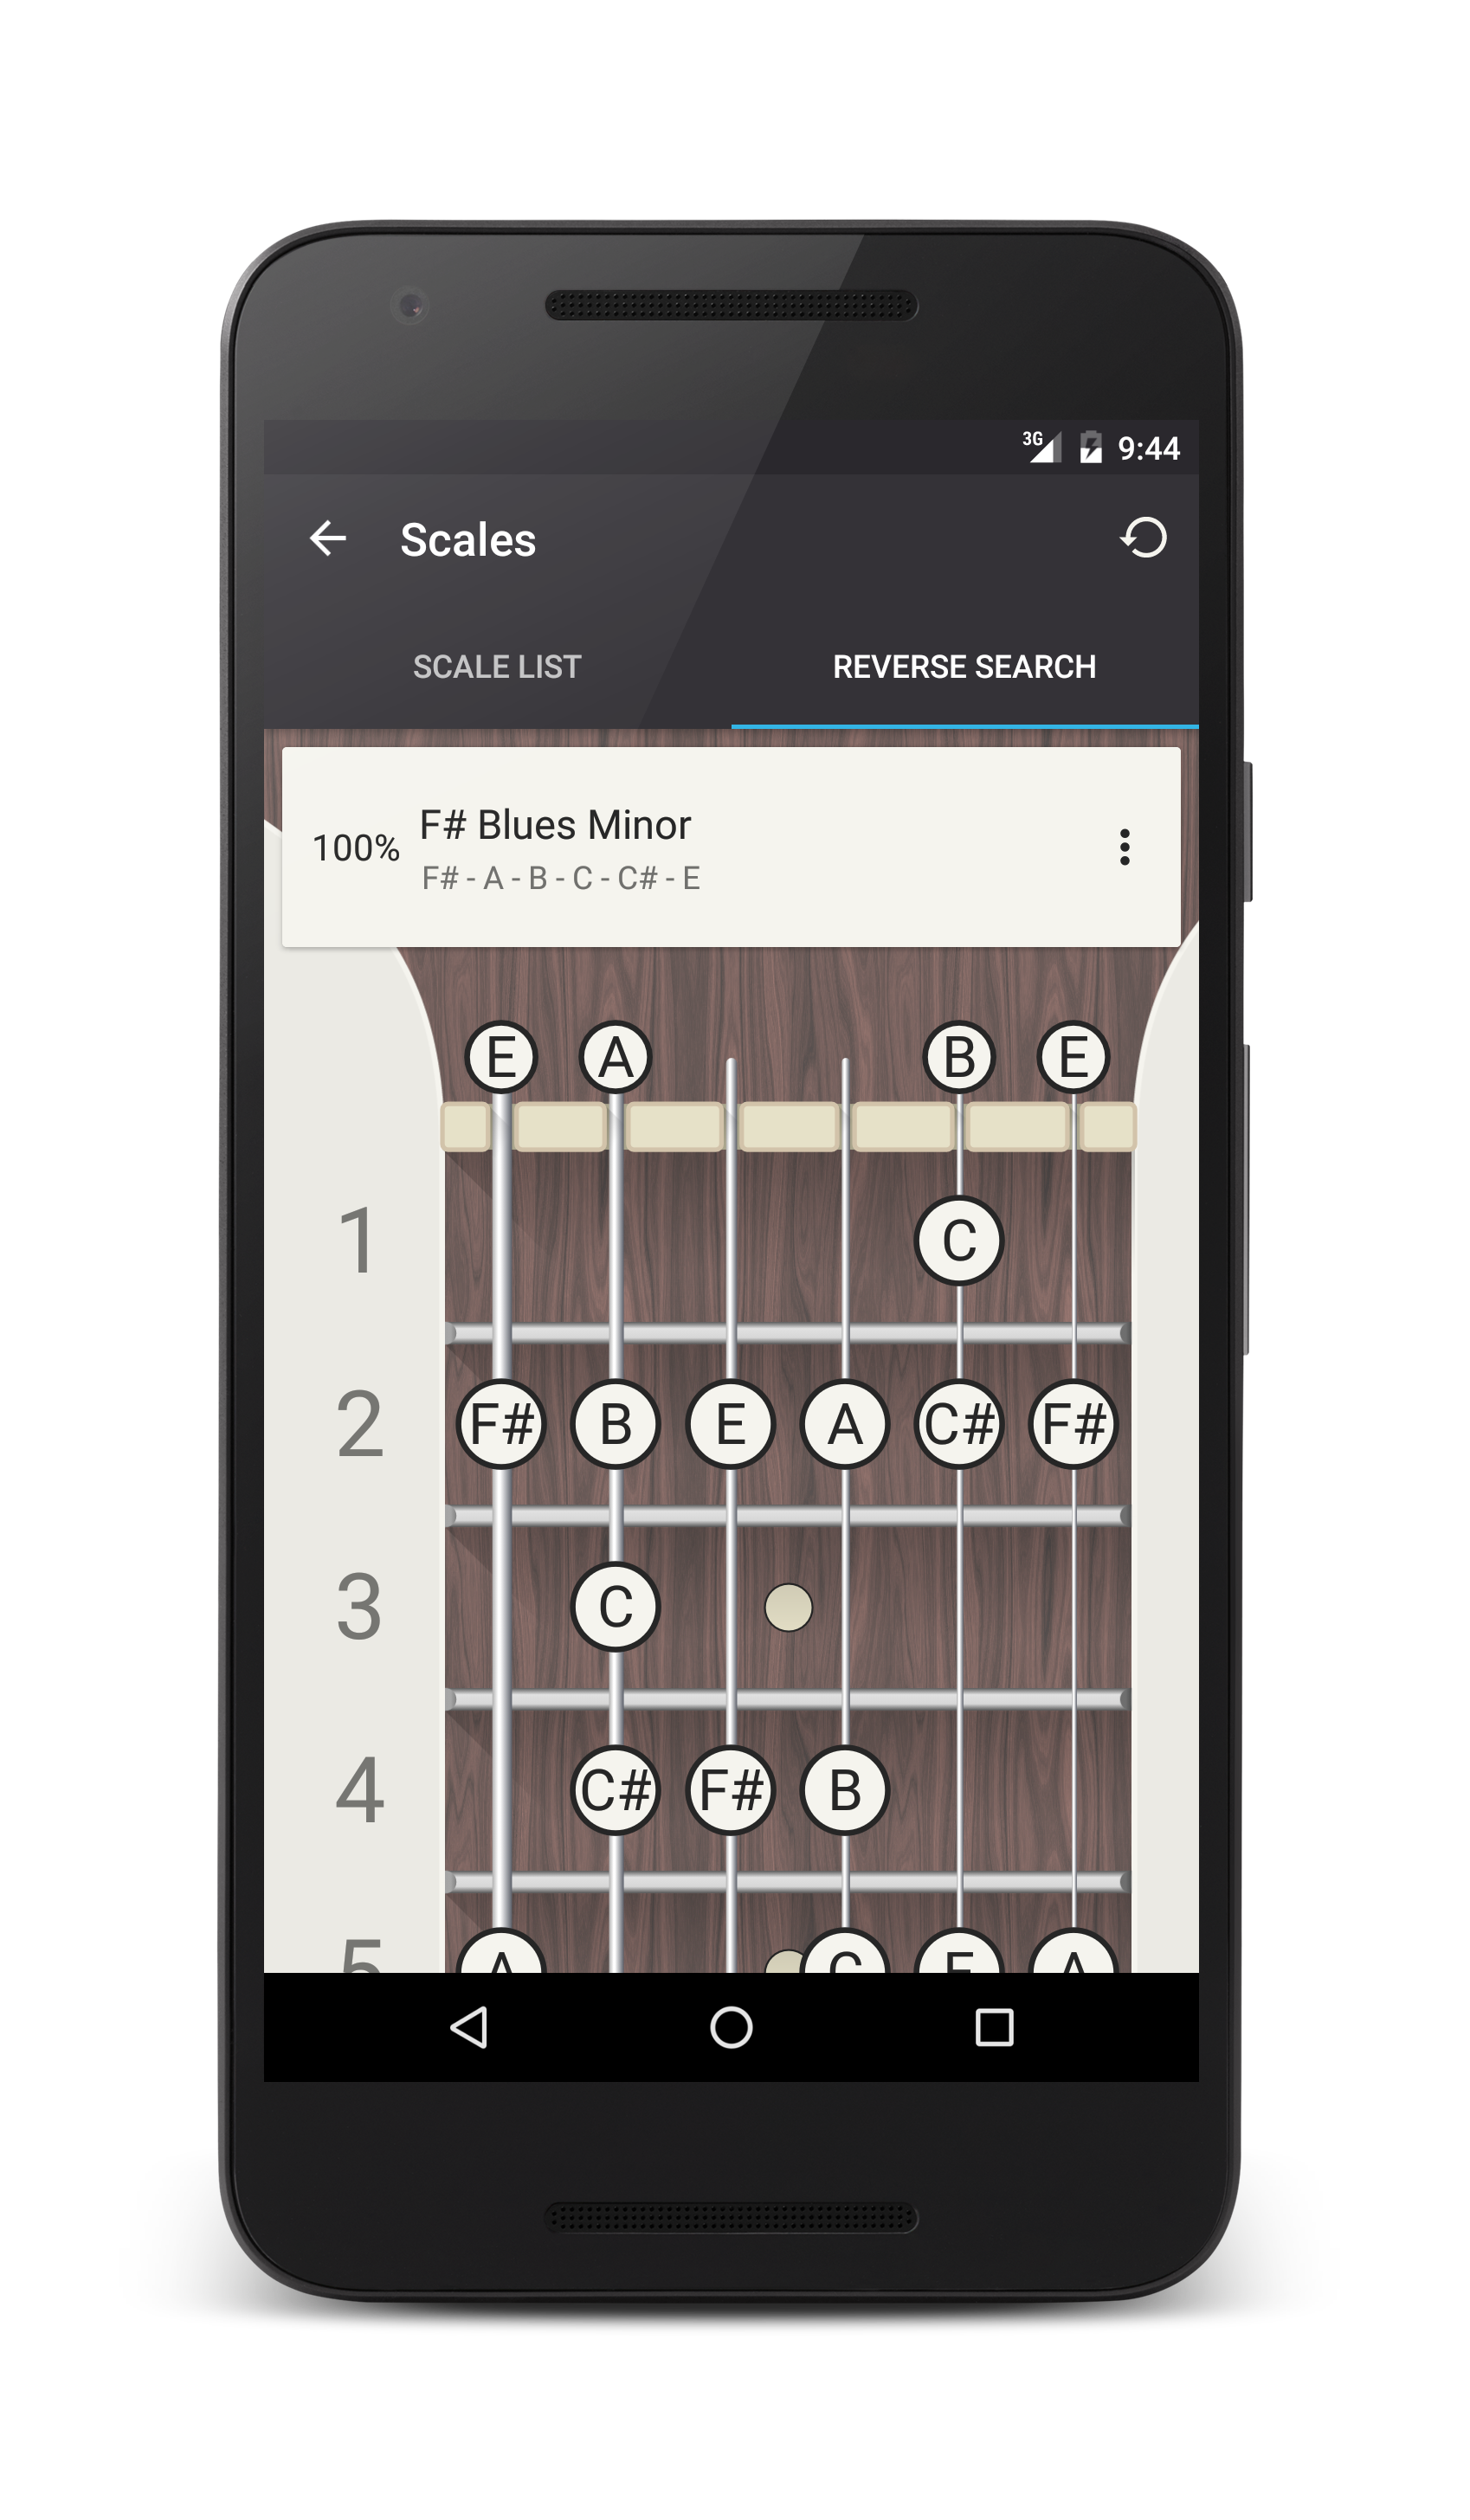
You can also reverse search a fingering. You simply enter the notes on the fretboard and the app will compute all possible scales and present them to you, ranked from the most to the least complete. On the iPhone, it displays only the best one and you have to tap the list button to display all the results.


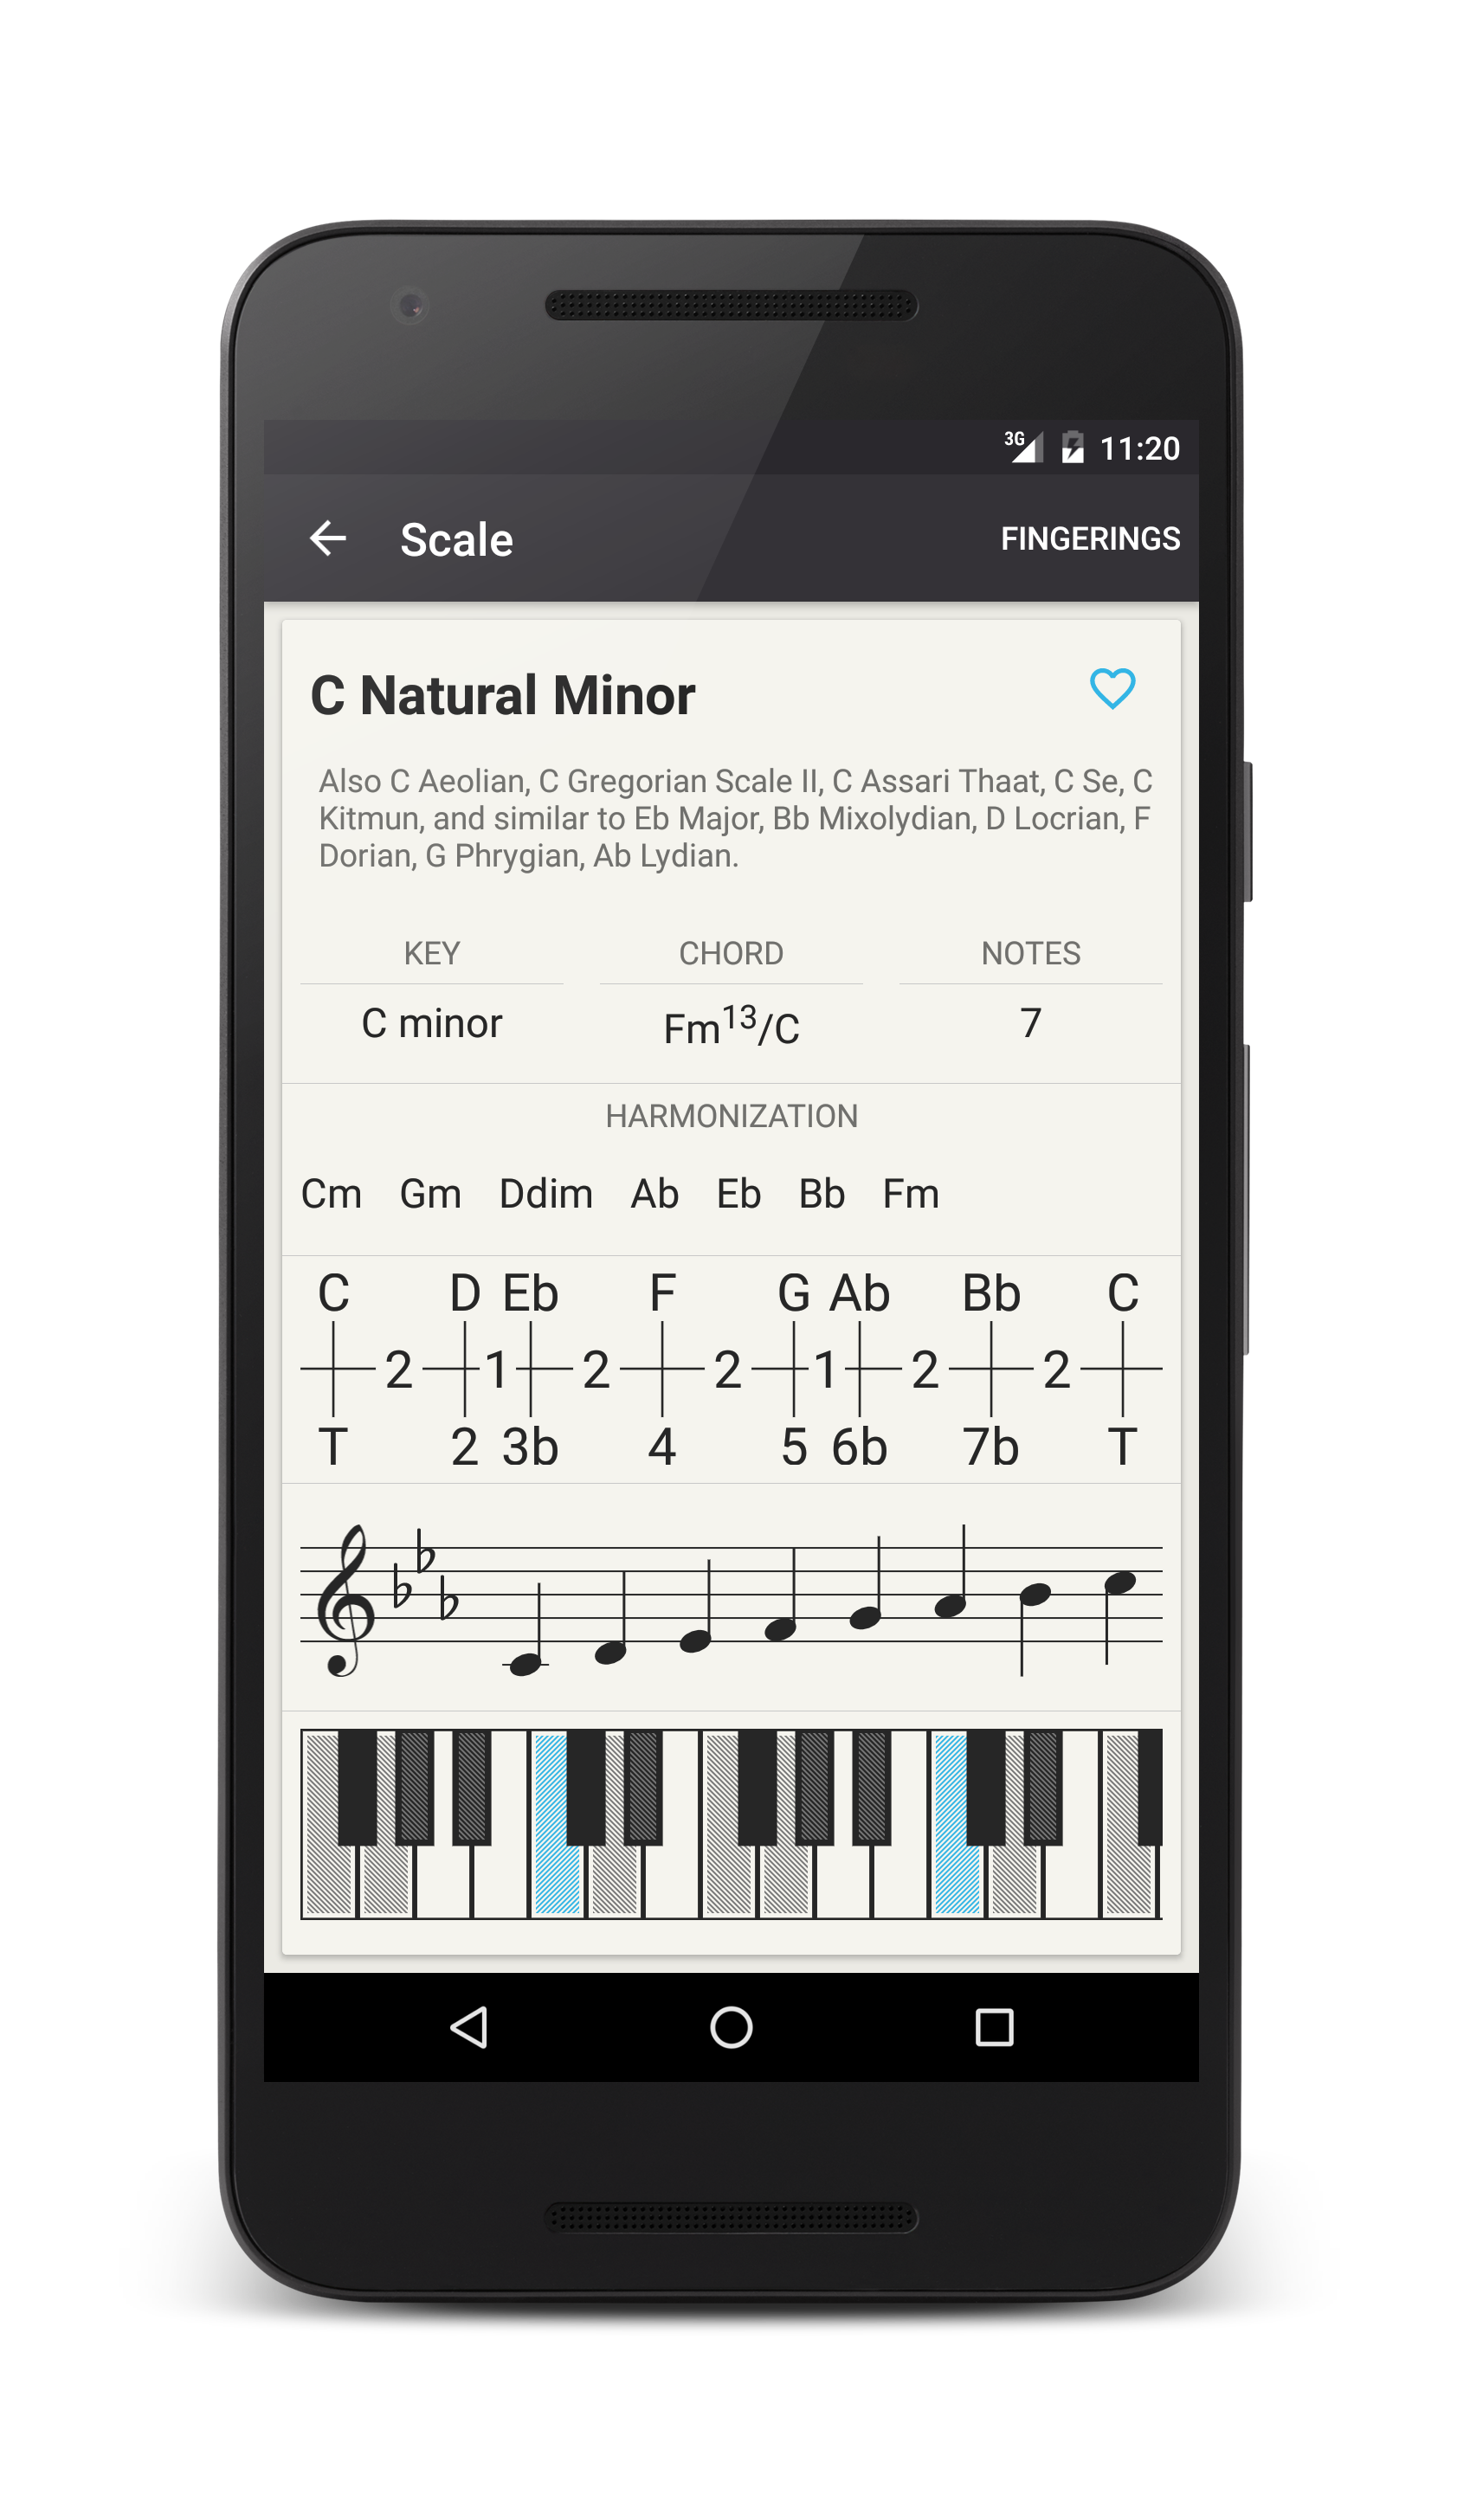
In any case, once you tap the desired scale entry, you are brought to the scale info screen. On this screen, you can see all the alternative names of this scale. You can also learn equivalent scales, that is scales with the same notes but a different tonic.
The key of the scale is computed automatically. It computes the distance from this scale to the major and minor scales. The closest ones are then filtered and ranked again, and the winner is the key of the scale.
The chord entry is the chord made of all the notes of a scale, which may be interesting when studying how chords are built.
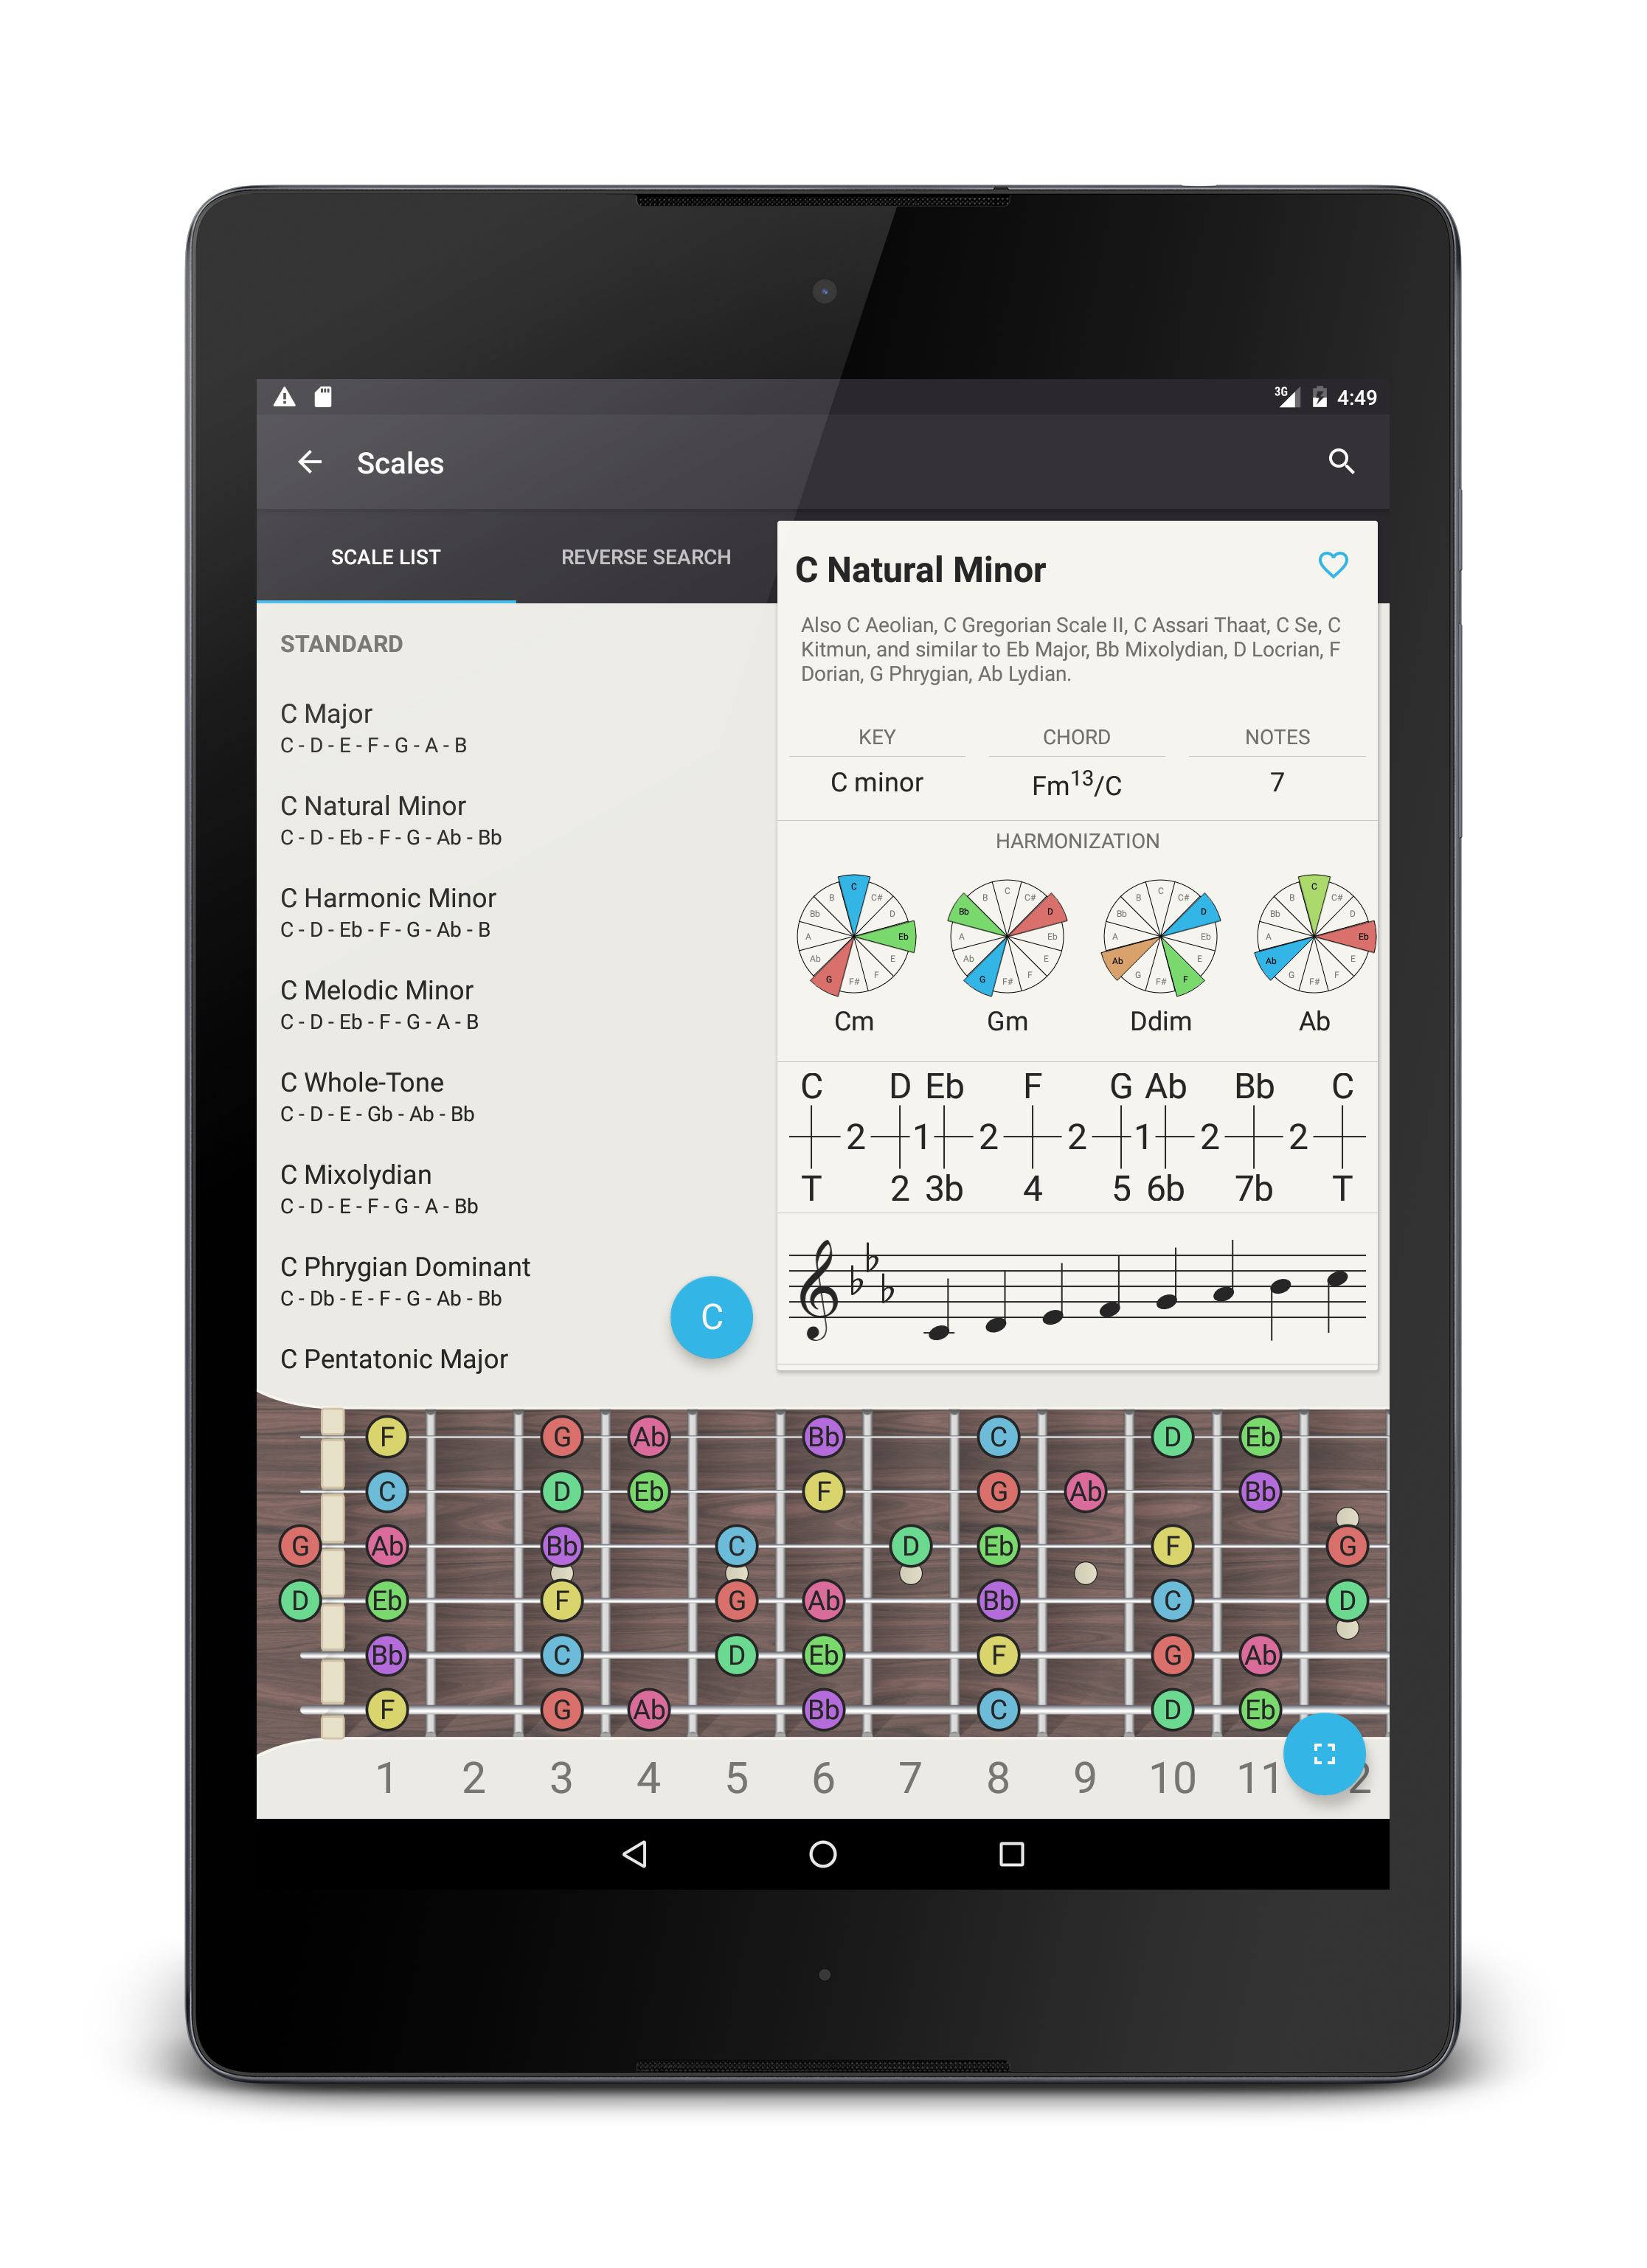
The list of chords that appears is called scale harmonization which is the usual way of extracting (or even creating) chords from a scale. If you slide toward the end of the list, a button allows you to access a screen with more settings about harmonization. You can then fix the number of notes of the chords, as well as the step size. For each cell, if you tap the chord, the app will compute corresponding fingerings and shows them to you. You can also hear a sound preview of each chord (played as a whole when touched, and arpeggiated when you drag your finger).


Back on the scale info screen, the three main views are touchable scale representations as a ladder, a score, and a piano keyboard. You can display true scale fingerings by tapping the “full screen” button
at the bottom right of this neck, or equivalently with the top right Fingerings button.
Scale fingerings and arpeggios
A scale fingering is a way to play a scale on a fretboard (which depends on the tuning). Let’s begin with a note explaining why arpeggios (which are coming from chords) are linked to scale fingerings. An arpeggio for a chord is a way to play successively (and not together) the notes of this chord. For example, if the notes of C7 are C E G B, a way to arpeggiate it starting from C3 (that it the “C” 1 octave below the “A4” at 440Hz reference) would be C3 E3 G3 B3 C4 E4 G4… for example. The notes of the chords a simply played as they come. You start with the first, then the second, etc., and when you reach the last note of the chord, you start over with the first note, and so on. This is very similar to playing a scale for which the notes would be the notes of the chord. Hence, the procedures to map these notes on a neck are the same, and the app uses the same screen to do both. In the following, we will only refer to scale fingerings for simplicity, but they can be replaced by “chord arpeggios” indifferently.
On the scale’s fingering screen is displayed a full-screen view of an instrument neck. This neck is multi-touchable. If you drag your finger across the frets numbers, the neck will slide (otherwise, your finger is on the neck, and notes are played instead). You can use the “locker” button to switch between “Scroll locked” and the default “Free touch and scroll”. You can also pinch to zoom out. Please note that you may need to hide the bottom bar with the “full screen” button to reach the locker button.
The bottom bar shows the list of scale fingering. It always starts with the “blank” fingering made of all the scale’s notes on a fretboard, followed by the fingerings the engine found with the given parameters (see below).
Generally, chords notes are scarcer than scale notes. As a result, the possible patterns on a neck are very different, and if one often prefers static scale fingerings (for which the left-hand stays at the same place), moving fingerings are more frequent for arpeggios (the left-hand moves along the neck while playing the fingering). For this reason, the settings for the fingering engine have to be different, and the app has two separate sets of settings: one for scale fingerings and one for chord arpeggios. You can of course use scale fingerings settings for arpeggios (or the opposite) if you want.
Here are a few words about available settings for the scale fingering engine of the app. The same engine is used for chord arpeggios as well, and the app handles two distinct sets of settings: one for scale fingerings and one for arpeggios.
Span by string
This is the widest fret range allowed on each string. It can be less, however. Think of it as the maximum extension of your fingers.
Minimum notes by string
This is the lowest number of notes allowed on each string. If you specify 0, strings can be jumped since fingerings with strings with 0 notes (hence jumped) will be allowed. You may use this value to restrict to fingerings with a specific number of notes by strings by matching this setting with the maximum notes by string. Of course, this value should be smaller than the span by string.
Maximum notes by string
This is the highest number of notes allowed on each string. Of course, it has to be at least equal to the minimum notes by string, and at most equal to the span by string.
Maximum difference by string
This sets the maximum difference of played notes from one string to an adjacent one (before or after). If you specify 0, all strings must have the same number of played notes.
Parity
A special prescription on the parity (even or odd) on the number of played noted by string can be specified. For example, if you select odd, only fingerings with an odd number of notes (1, 3, 5, etc.) by strings will be generated. It can be useful if you play with a pick and want to practice certain configurations.
Maximum backward and forward offset
The app checks the fret of the first played notes on each string. These settings allow limiting the difference of such frets between one string and the next one. Backward means toward the nut, and forward, toward the bridge. These properties are outlined on the fretboard at the top of this page.
Static fingerings
This is closely related to the maximum backward and forward offset settings. These limits are valid from string to its adjacent ones, but small steps can add up as the strings are played, and the fingering may end at a very different position. If the static fingerings option is engaged, the app will allow only one unit of offset at most for the whole fingering. For example, if you set the maximum backward offset to be 1, it means that the fingering can go toward the nut of 1 fret at most each time you change of string. If it started at the 5th fret on the top string, it can go as far as the 4th fret for the next string, then as far as the 3rd fret on the following one, and so on. If static fingerings are required, if it start at the 5th fret, any other string (and not only the next one) will be played at least at the 4th fret. This setting is especially useful when working with scale fingerings when one looks for block patterns. This is less true for chord arpeggios.
Enforced direction
You can use this setting to force fingerings to go in one specific direction when passing from strings to strings (if ever they move). For example, if the bridge direction is selected, from string to string, the first fret played will be at least the first fret played of the current string. Never less.
Octave changes
Imagine that you are currently at one position on the neck, playing the F of the C major scale. You know that the next note will be a G. In order to sound natural, the G should be the immediate G following the F you’re playing. However, all the settings above may allow reaching a G that is one octave higher than the expected G. If the Octave changes setting is set to natural, this higher G will be discarded and the app will look exclusively for G’s at the “right” pitch. If ever the can jump value is selected, fingerings jumping from the F to this high-pitched G will be generated too.
Arpeggios
This setting appears only for chord arpeggios. There is a fundamental difference between scale fingerings and chord arpeggios: scales are defined on 1 octave (12 semitones), whereas chords are commonly requiring 2 octaves (24 semitones). For example, for a C9 chord, the 9th is the D one octave higher than the root C. The chords notes are C E G B D. If we arpeggiate it starting from C3, one starts with C3 E3 G3 B3. The next note should be D4, but there is a C4 reachable before it. If we are rigorous, one bypass it to go directly to D4, but the next note is then the C coming after D4, that is C5 and we completely bypassed C4 as well as E4, G4 and B4. This is a perfectly valid way to do it, but it is not very efficient. For chord arpeggios, the app has an option to “fold” chords and generate arpeggios for which chord notes on the neck are ordered by their pitches and not by their position in the chord. As a result, if the folded value is selected, the app will generate arpeggios of the form C3 D3 E3 G3 B3 C4 D4 E4 G4… otherwise, of the form C3 E3 G3 B3 D4 C5 E5… if the strict order value is selected.