Chords
Chord Fingerings
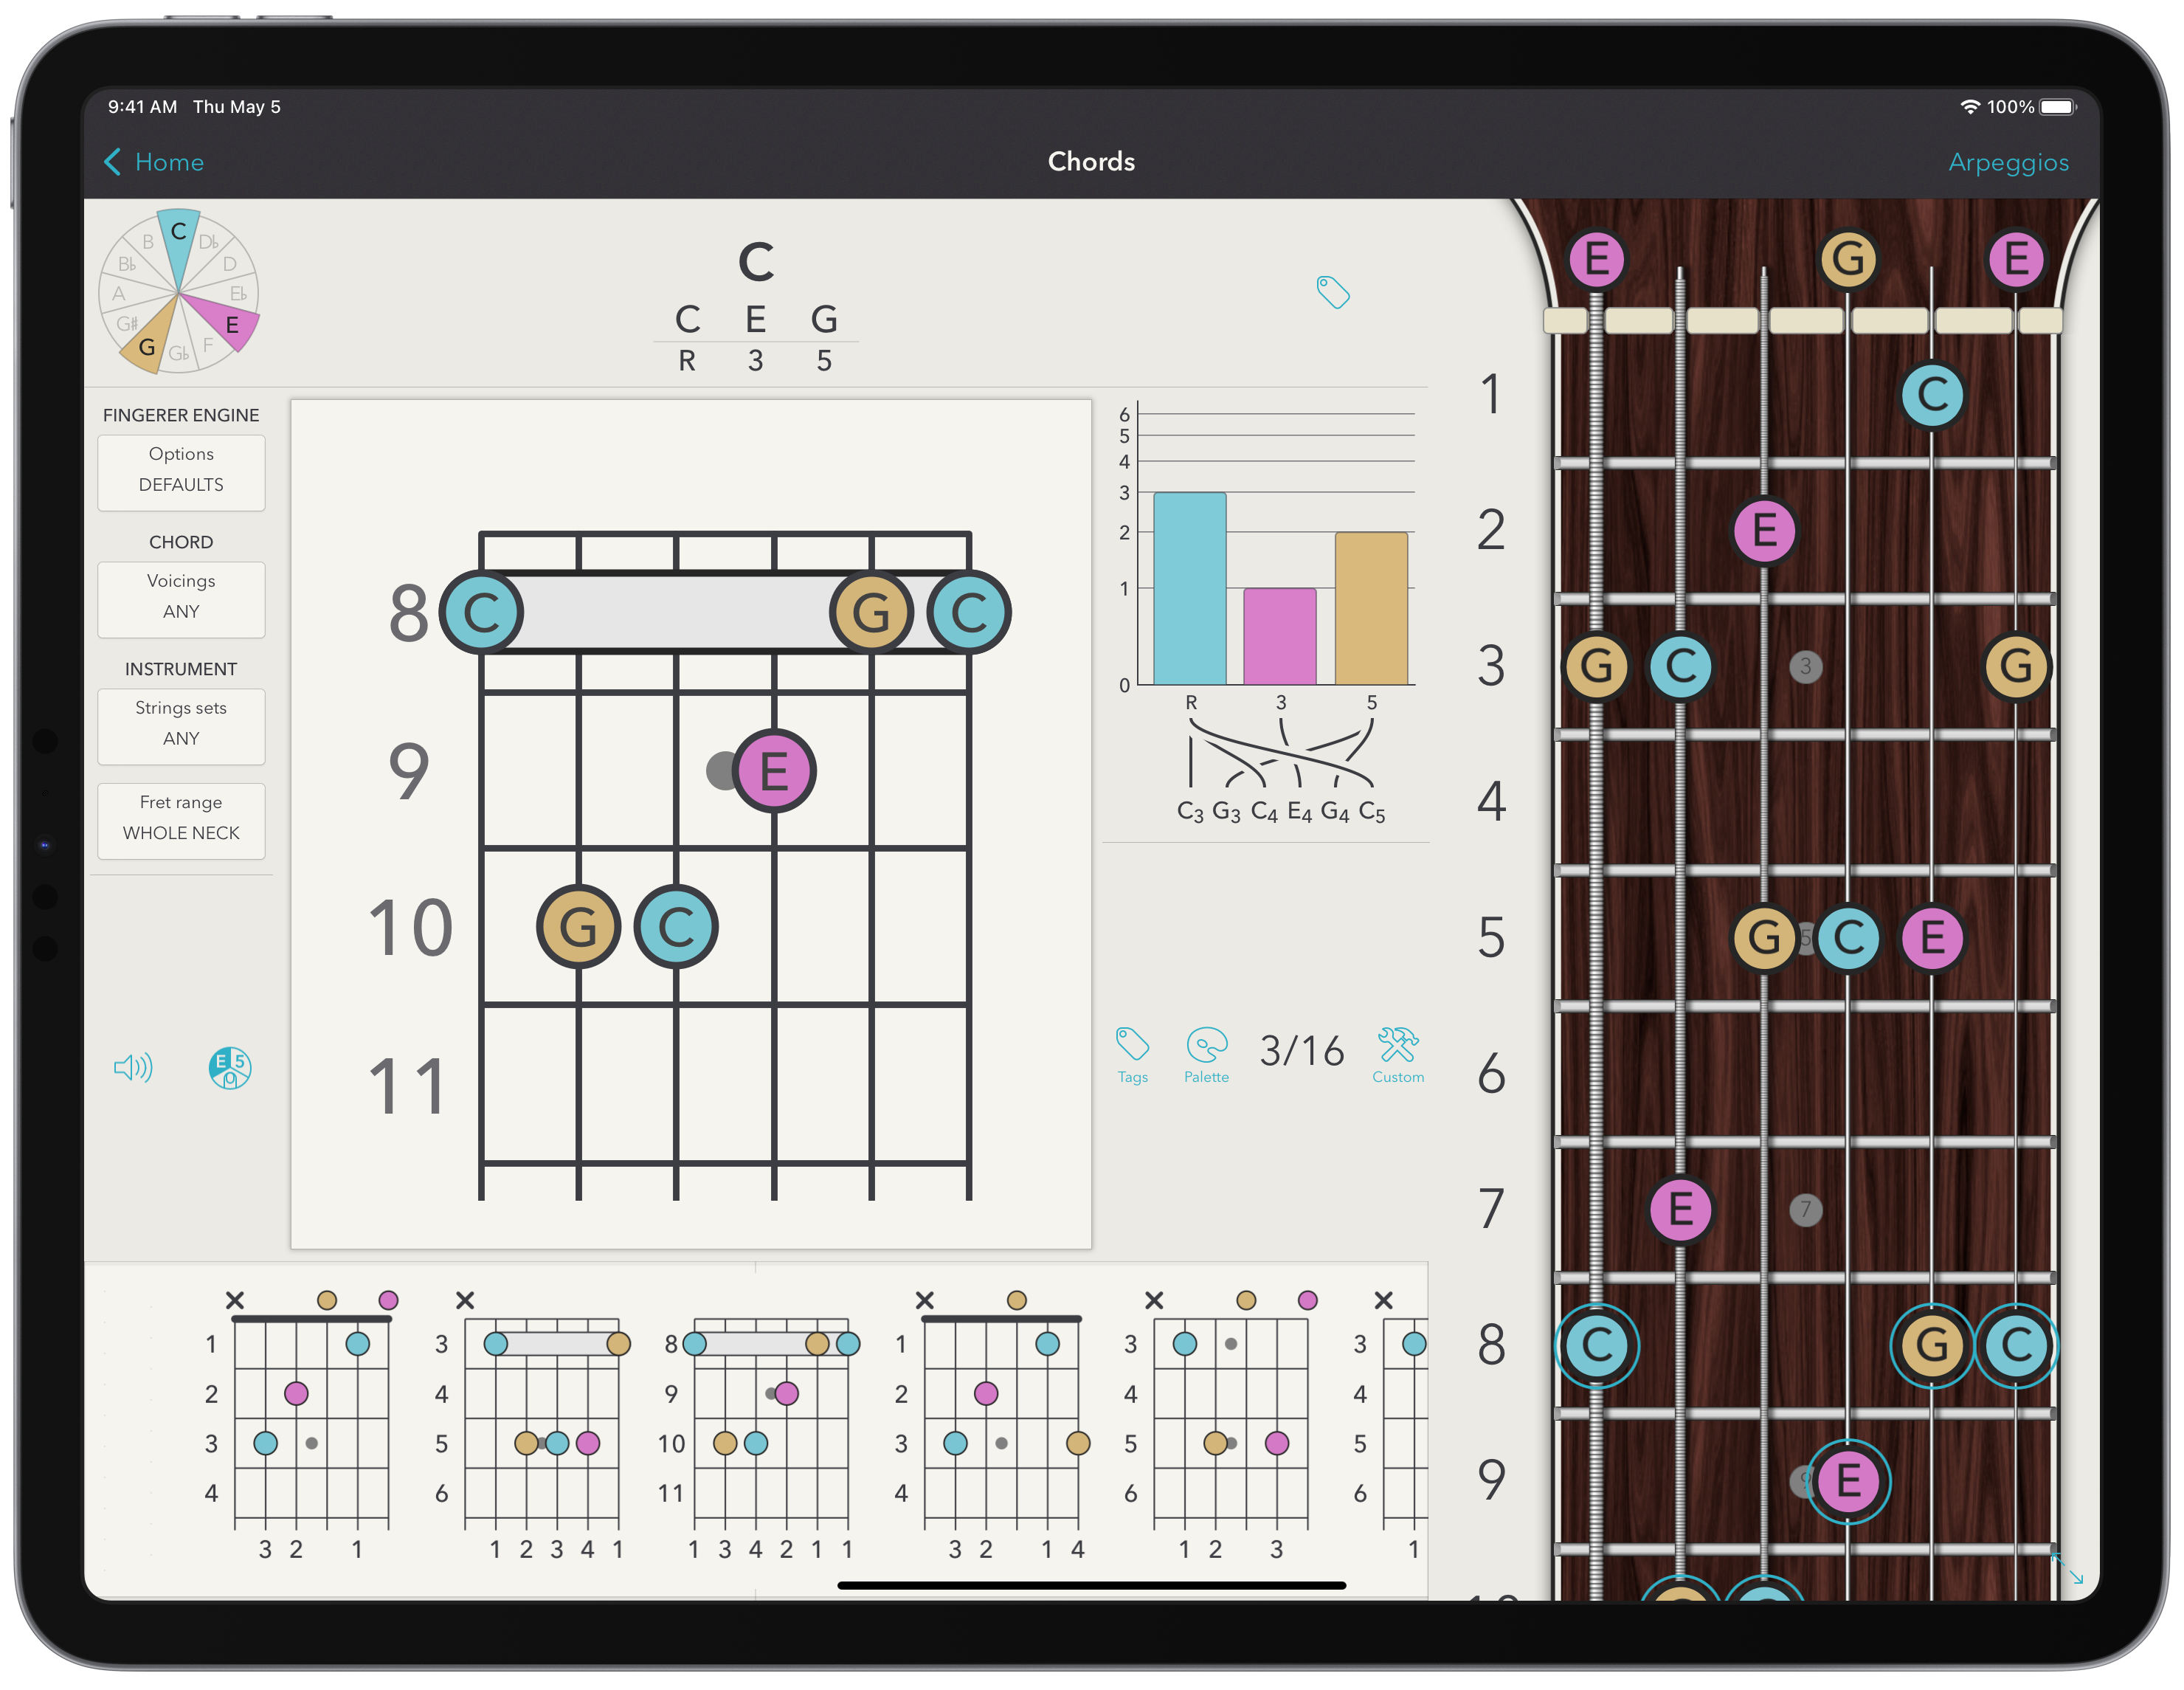
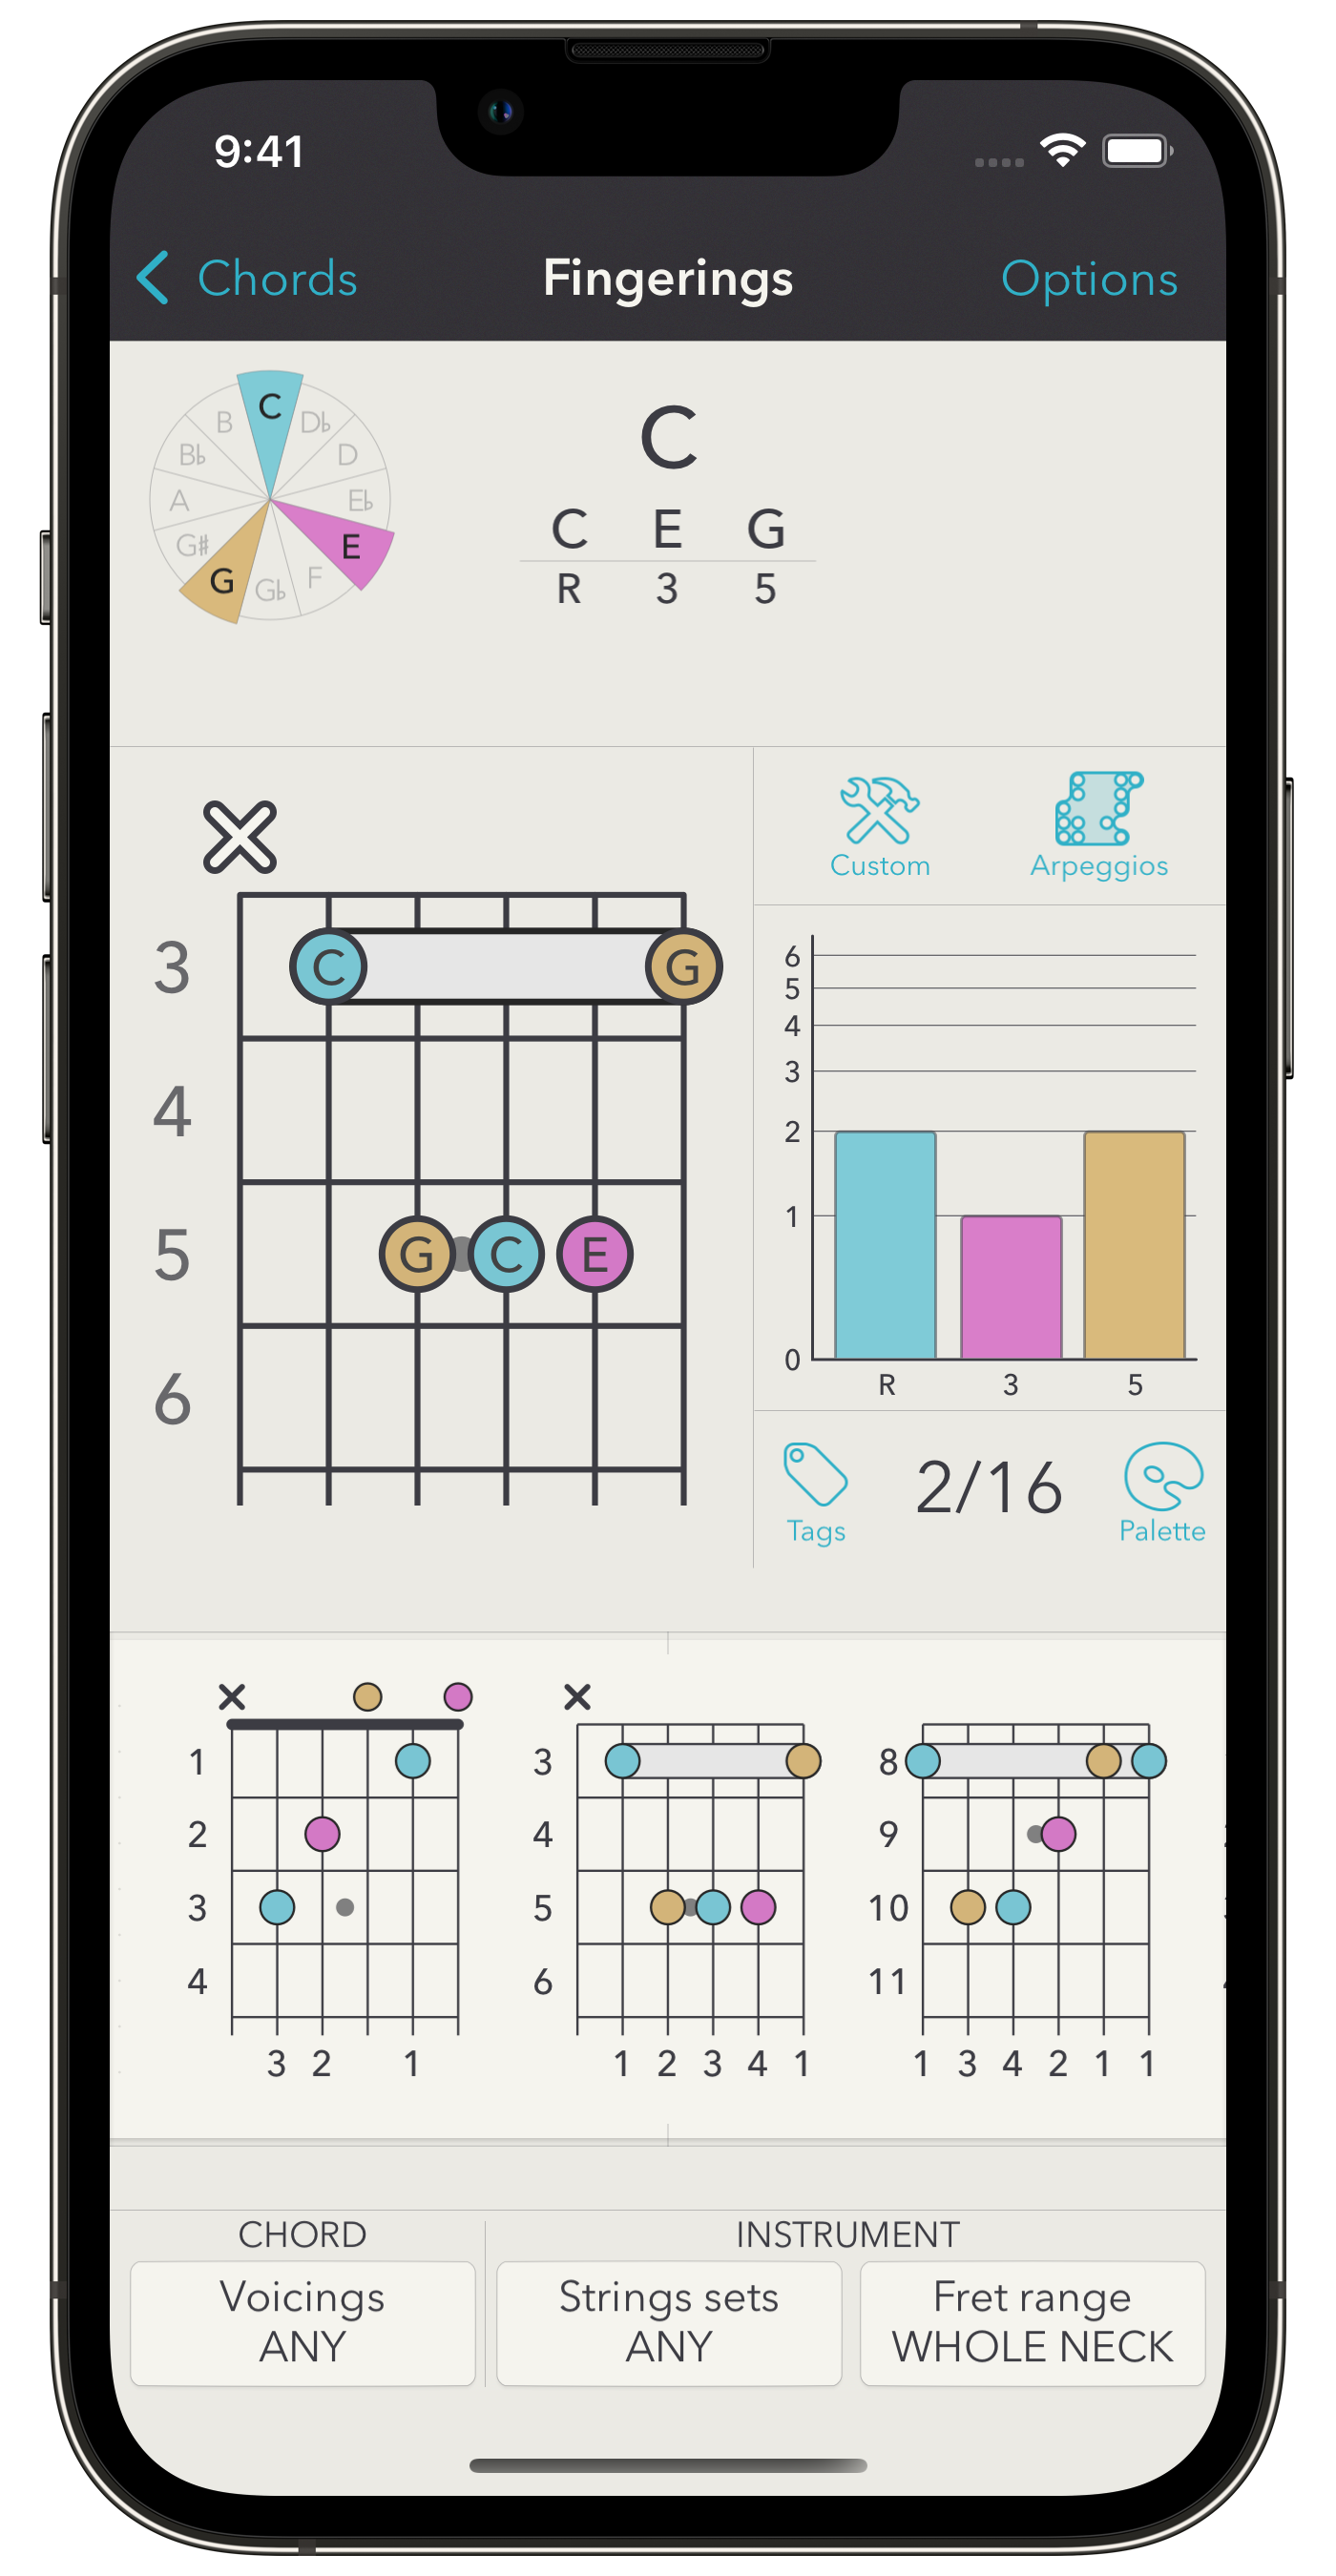
On the chord fingerings screen, you can refine fingerings in several ways. Use the Options button to override your current defaults (as defined in the Settings section of the app). This allows to quickly relax or tighten some properties on the case by case basis.
Voicings
The Voicing button allows filtering fingerings more musically. You can manually force the engine to omit some notes of a chord. For example, if you uncheck the 5th interval, only fingerings without the 5th will be displayed.
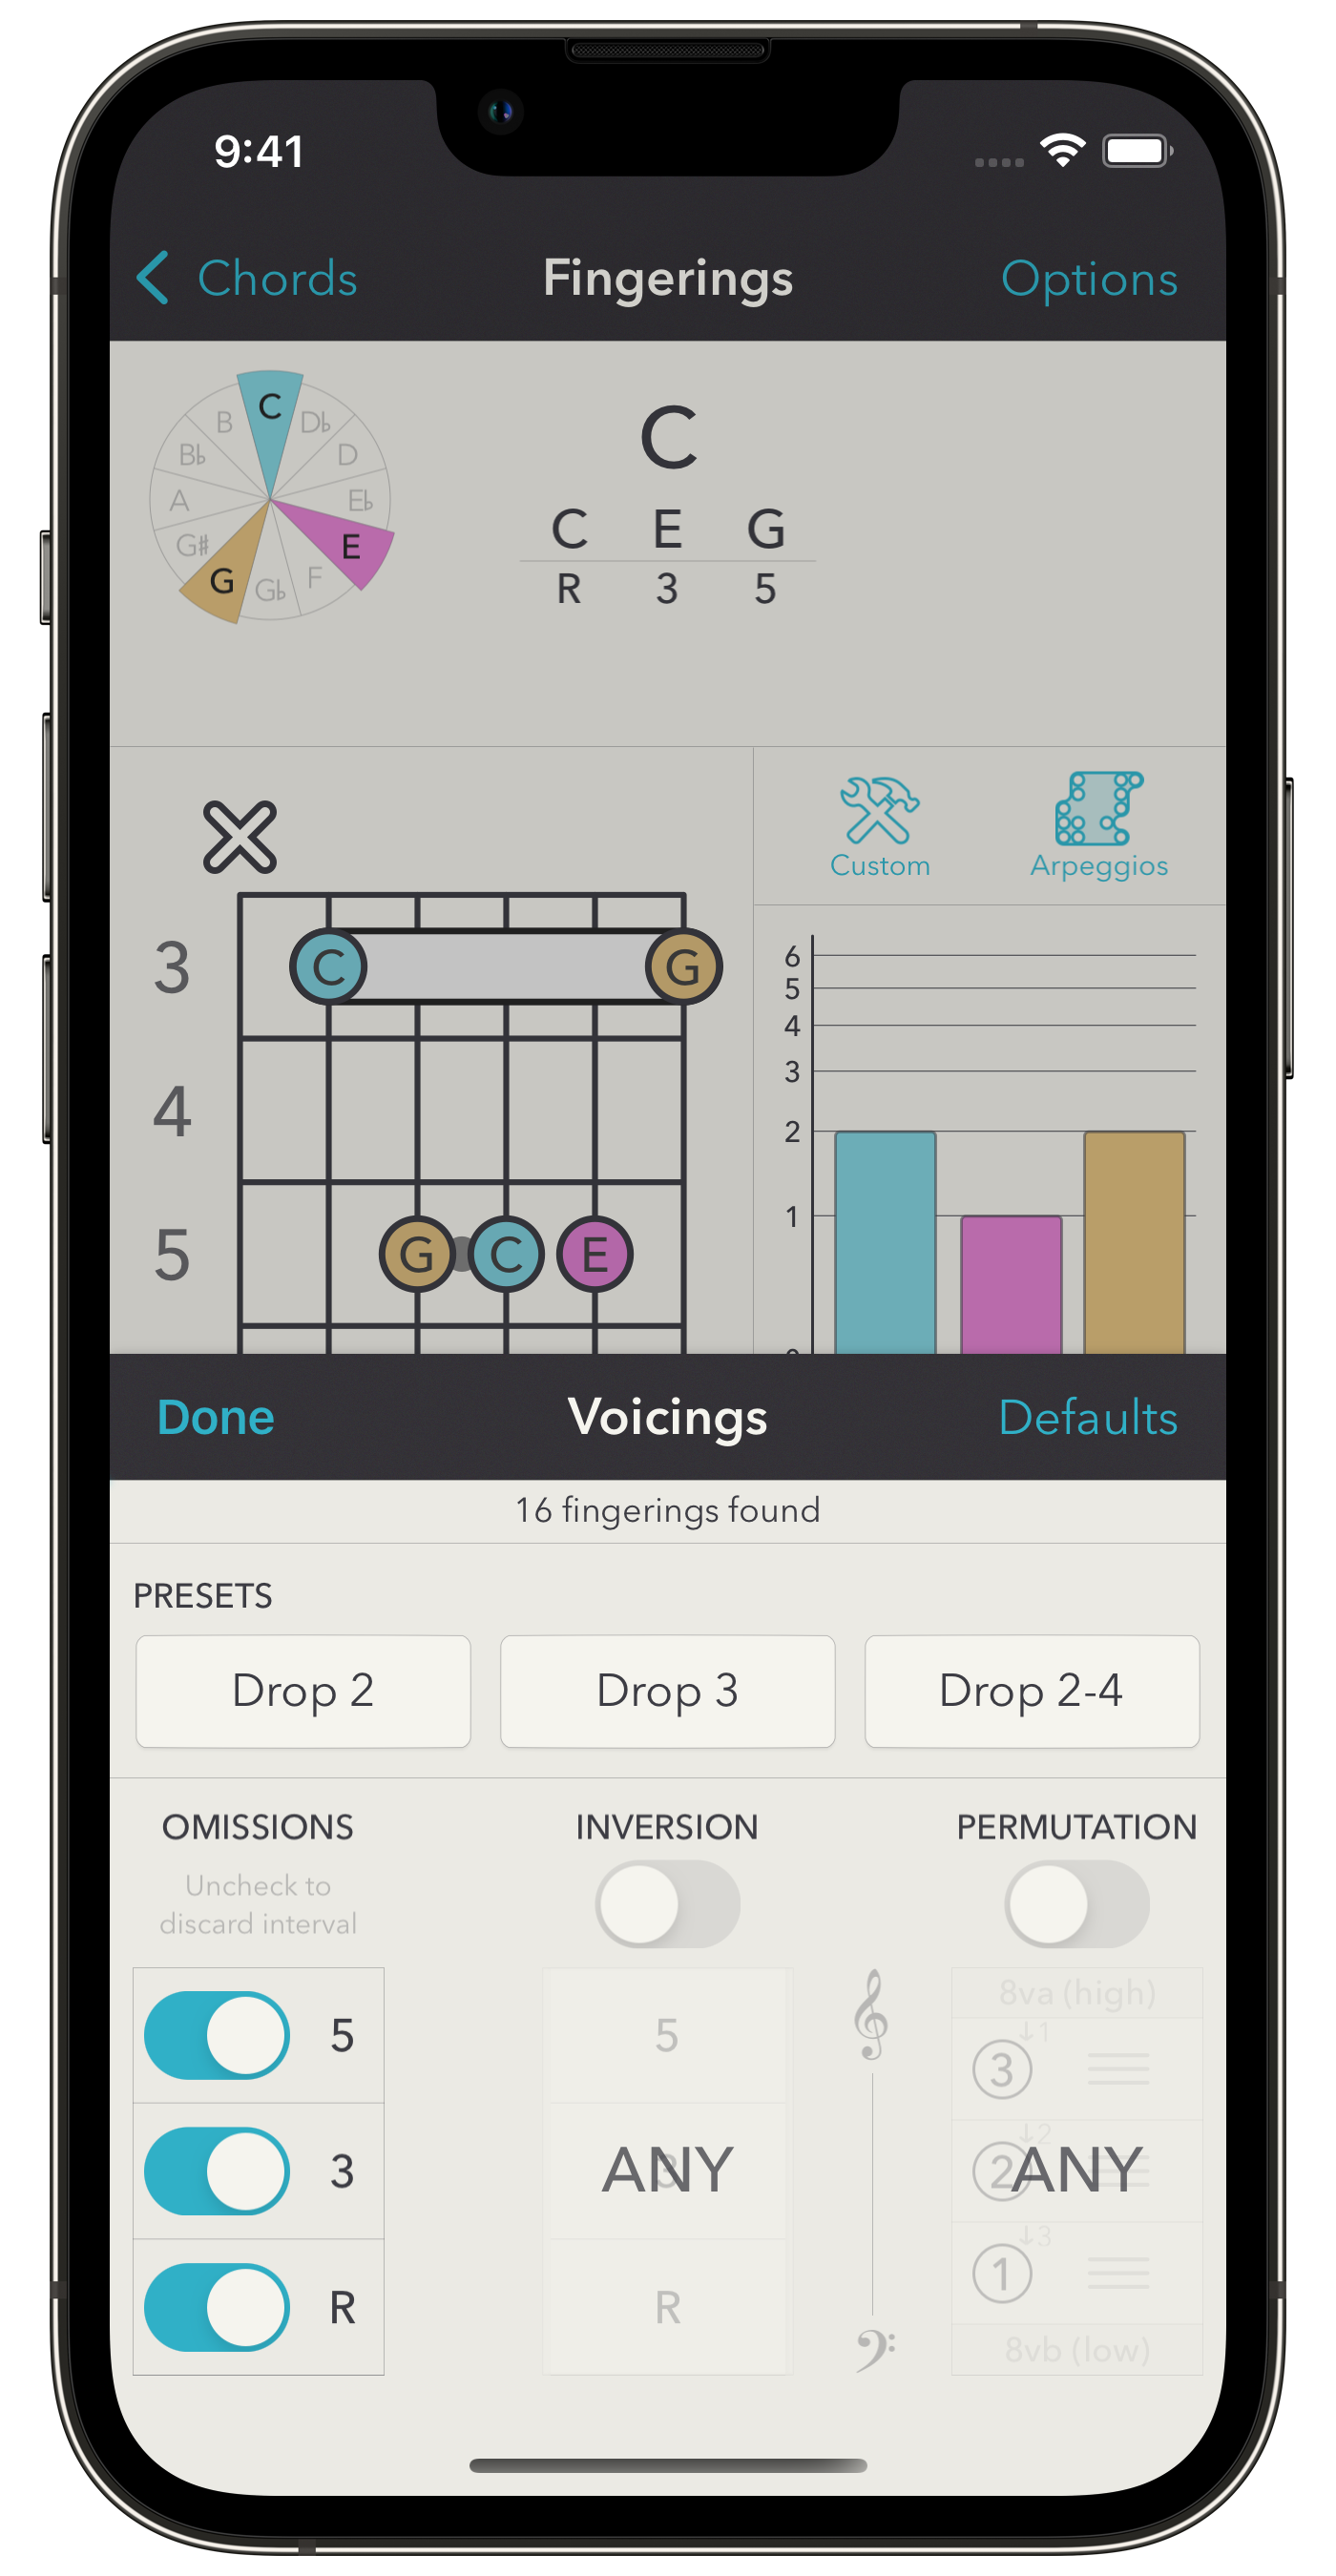
You can also force a specific inversion. In this case, only voicings with the notes appearing in the “right” order will be generated. For example, for a dominant 7th chord, only voicings for which the notes from the lowest to the highest are in the “chord” order will be generated, that is R 3 5 7 for the first inversion, 3 5 7 R for the second, etc.
This last part called permutations is more complex and needs a little explanation. This is mainly the land of Drop voicings, but you can go farther. You can select a pattern on the order of the notes of the voicing. For simplicity, imagine at first that the chord is a dominant 7th one and that the 1st inversion is selected. The intervals of the chord are gathered into one central zone surrounded by two other zones. The central zone is the reference. Intervals within this zone will appear in this specific order.You start by [][R 3 5 7][], so only fingerings where the Root is followed by the 3rd, followed by the 5th, then the (minor) 7th will appear. If you move 5 at the beginning to get [][5 R 3 7][], only voicings with this formula will be generated (these are Drop 2 voicings in this case).
However, if you move one interval to one of the other zones, you will force a one-octave jump (up or down depending on the direction) between this interval and the ones of the central zone. If you move R and 5 to the first zone (aka 1 octave below) to get [R 5][3 7][], the only fingerings generated are going to start by the Root followed by the the 5th, then the 3rd (but 1 octave at least above the 5th), followed by the (minor) 7th (in this case it corresponds to Drop 2-4 voicings).
If you are still following, let’s tackle the tricky part: If no specific inversion is selected, the app will generate permutations corresponding to all inversions. In this case, the permutations are relative to the positions in the inversion, and not to the intervals. For example, for a 4 notes chords with no inversion, permutations are starting with [][① ② ③ ④][] and the app will generate all the inversions of a chord, with ① being replaced successively by R, then 3, etc, and ② by the interval following ① (so 3, then 5, etc.). Drop 2 voicing for 4 notes chords will then correspond to [][③ ① ② ④][] (the 2nd note from the end (③) was dropped of 1 octave and lands before ①). Thus, if no inversion is specified and for a dominant 7th chord, the app will consider voicings of the form 5 R 3 7, 7 3 5 R, R 5 7 3 and 3 7 R 5. If ever an inversion is selected, only the kind corresponding to the inversion will be generated, as stated above.
If you never heard about drop voicings, all of this may seem very confusing and I recommend that you google “Drop 2 voicings”. It’s not as difficult as you think. The bottom line is that Drop 2 and Drop 3 voicings are usually easy to play and sound nice.
Strings sets and fret range
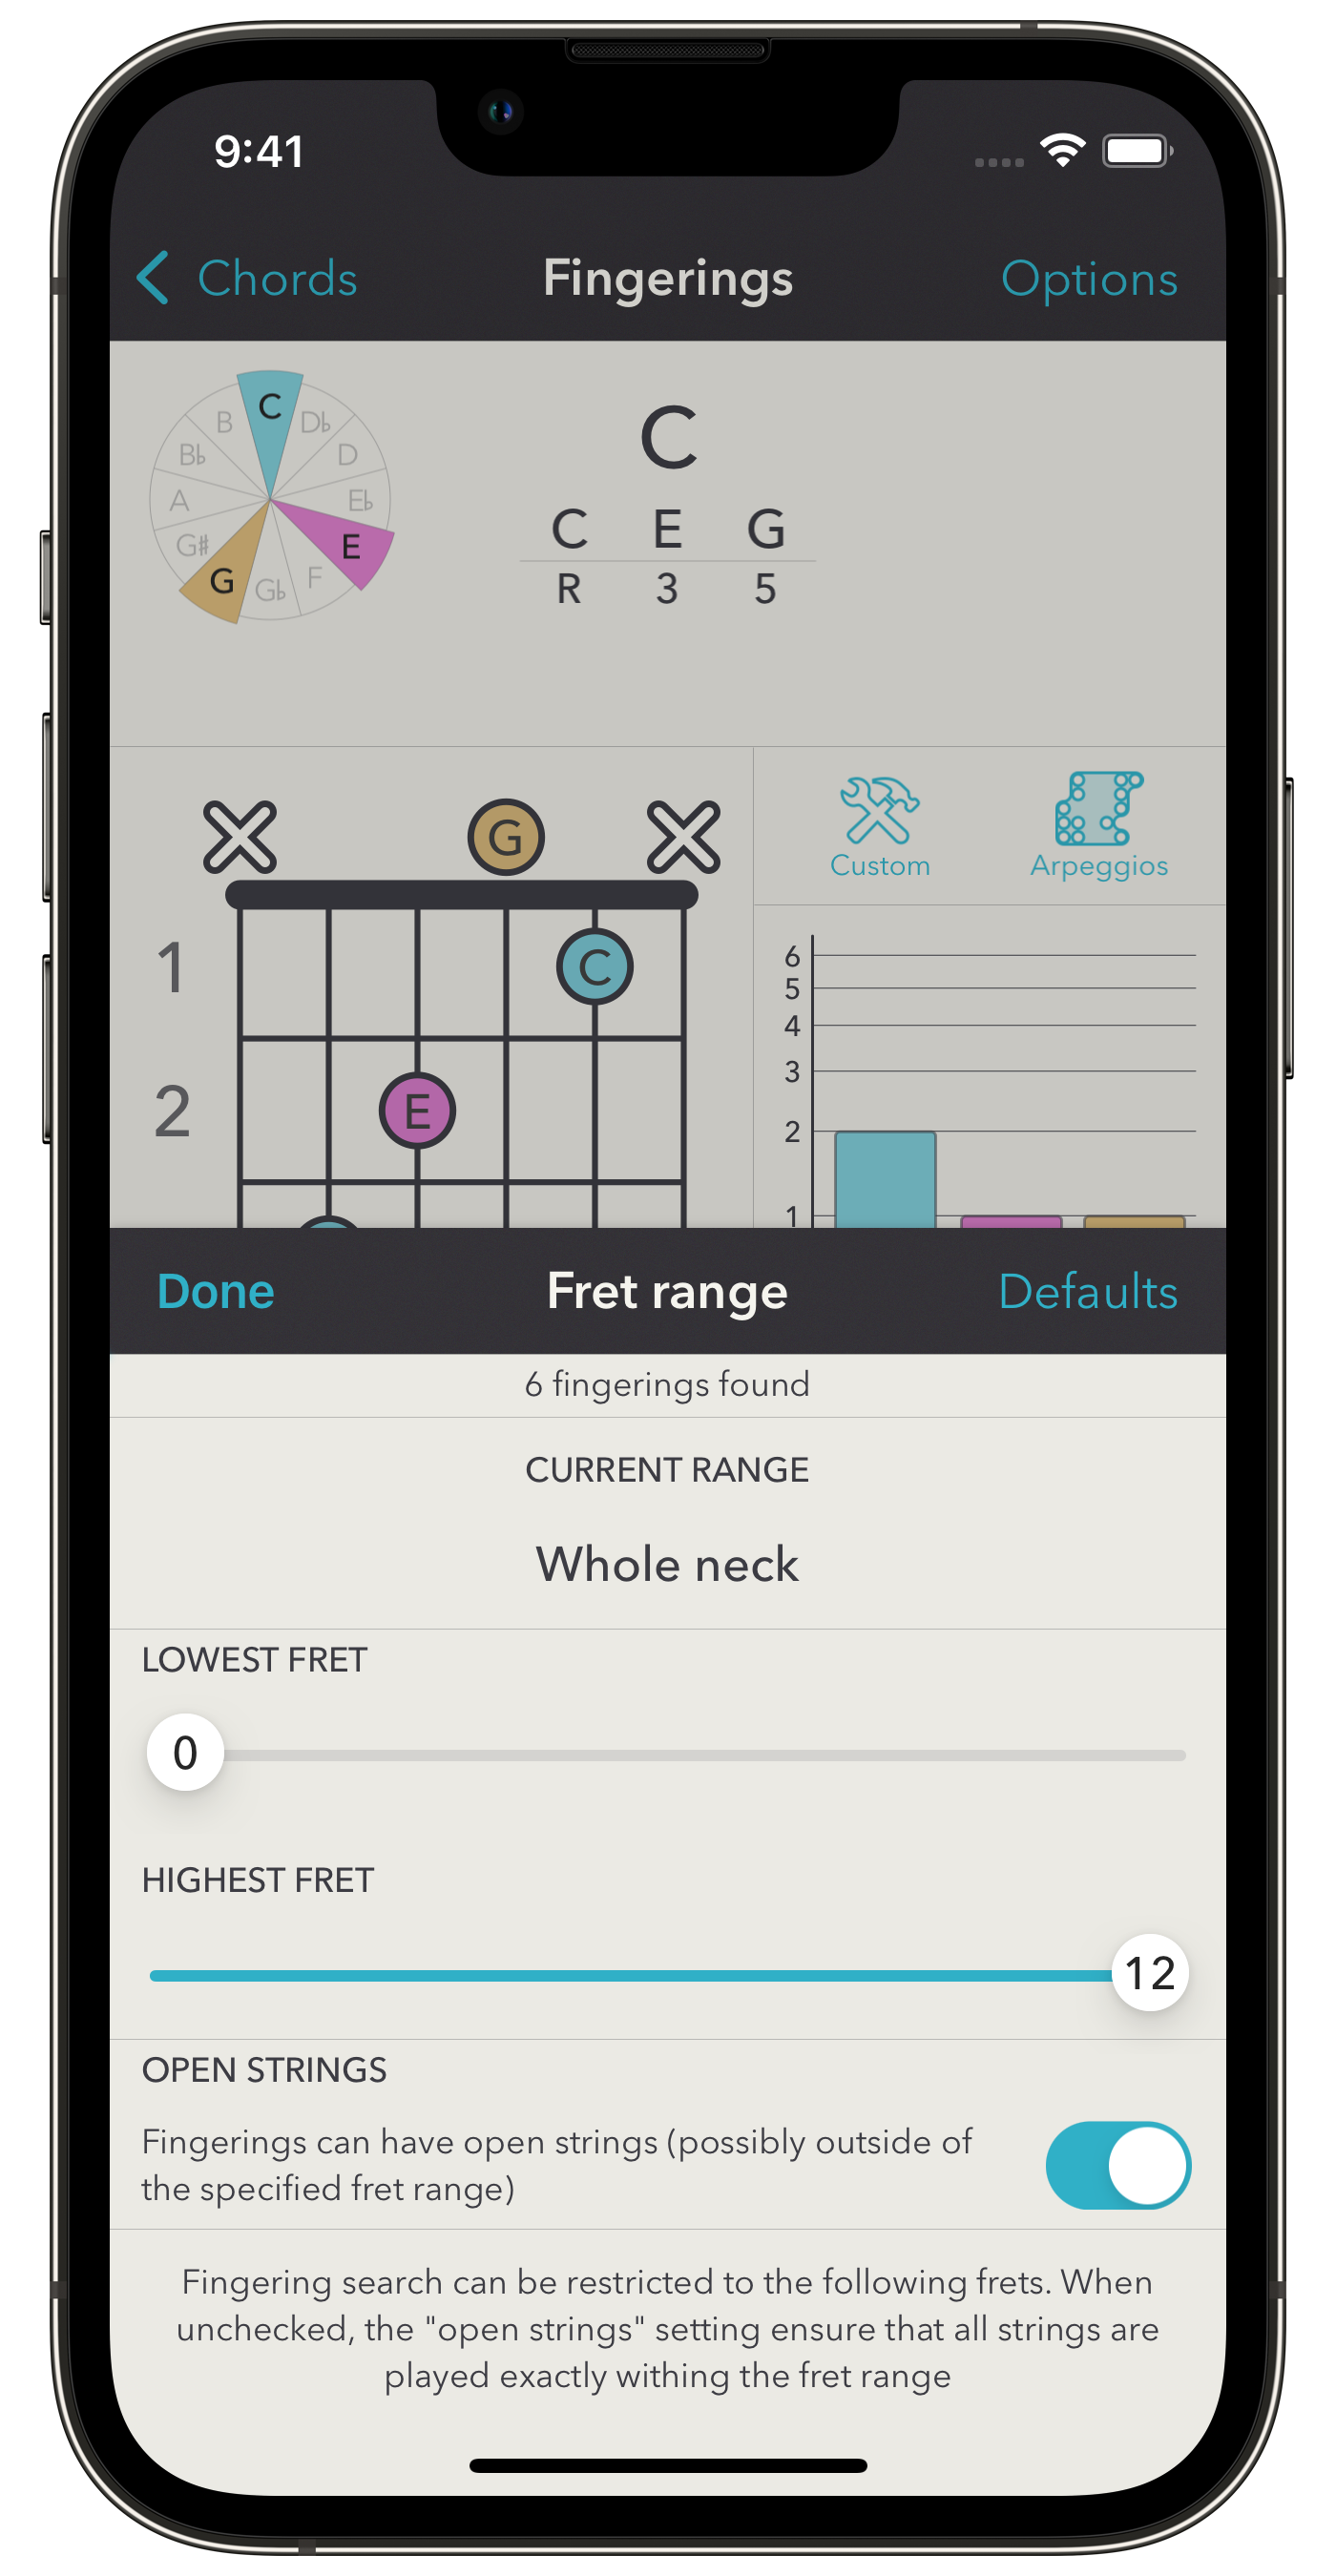
This is way easier than the voicings! You can simply specify on which strings the fingerings must occur (that is fingerings involving any string outside the required ones will be discarded). You can specify several sets of strings, and in this case, only fingerings matching one of the sets will be kept. For example, for a 6 strings guitar with strings 654321, you can look for fingerings played exactly on 4 adjacent strings by requiring the string sets to be one of 6543--, -5432- or --4321.
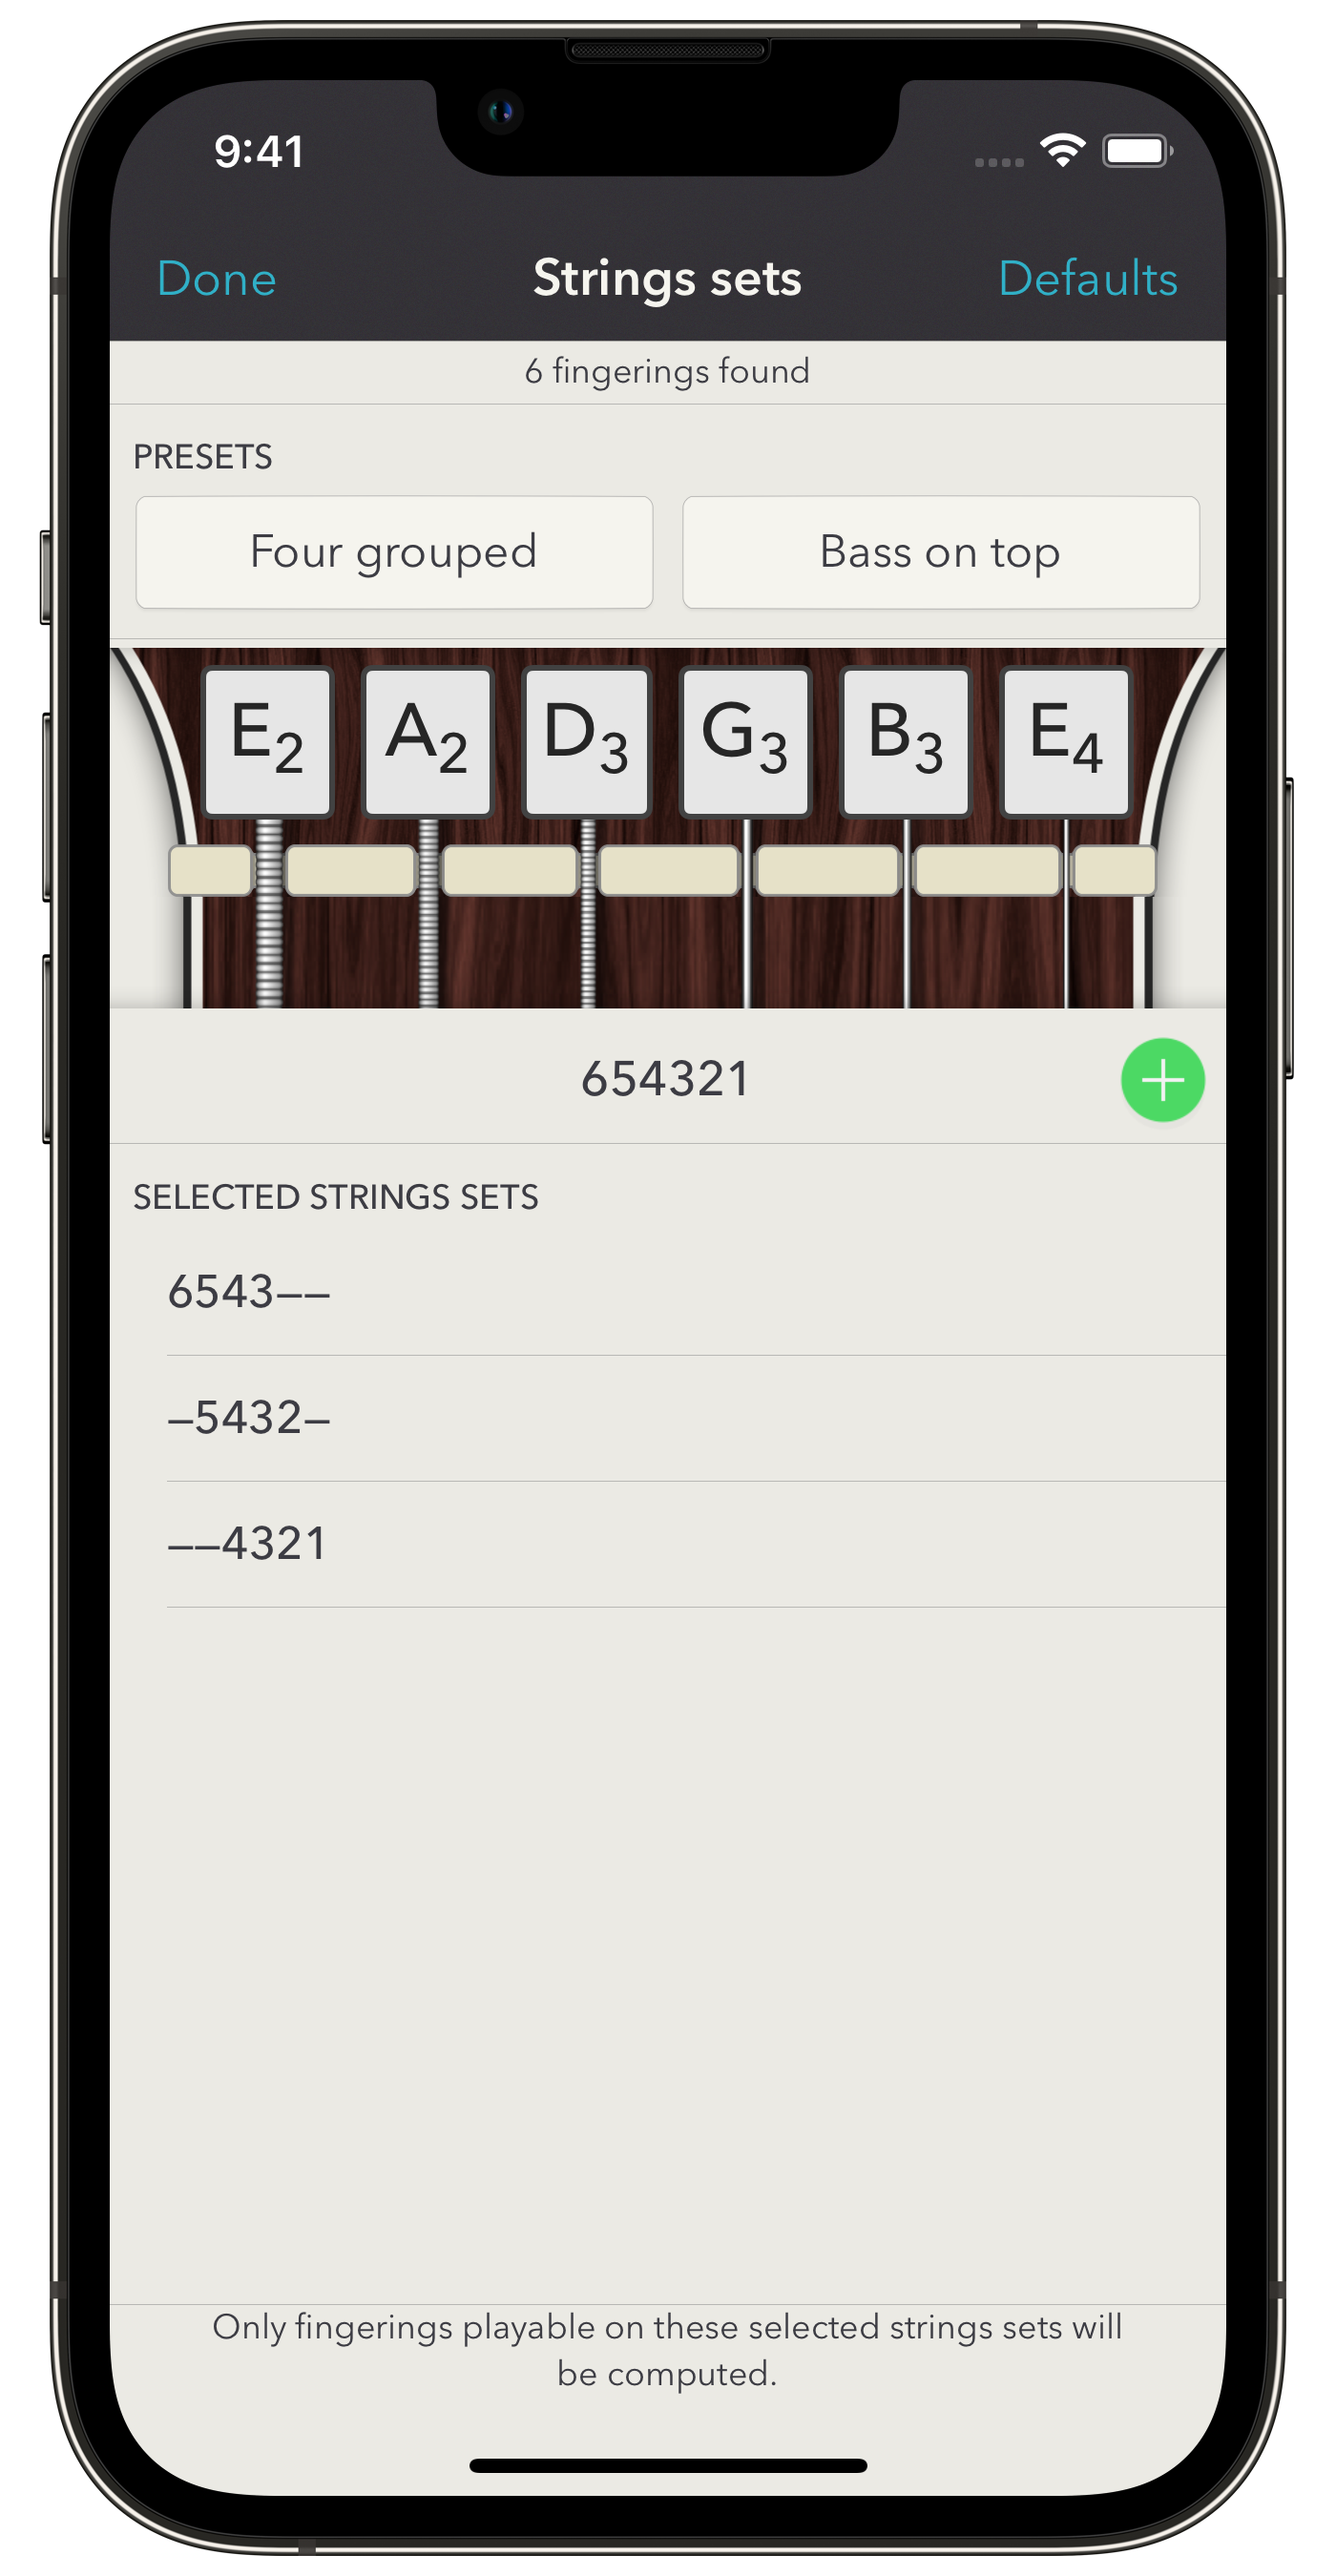
The same for fret range: you specify a low and a high fret and all the fingerings will be able to fit between these frets. Open strings can easily be included even if the low fret is higher than 0 (the nut), or you can tell the app to be strict and forbid open strings in this case.
Arpeggios
Misc.
You can tag the selected chord fingering. If you tag it with the Working Palette tag, it will be easily accessible when writing a song (provided the song tuning is the same). You can also create custom chord fingerings. This is explained more precisely here. At least, you can compute chord arpeggios. Since this is closely related to scale fingerings, please see this section to learn more about them.
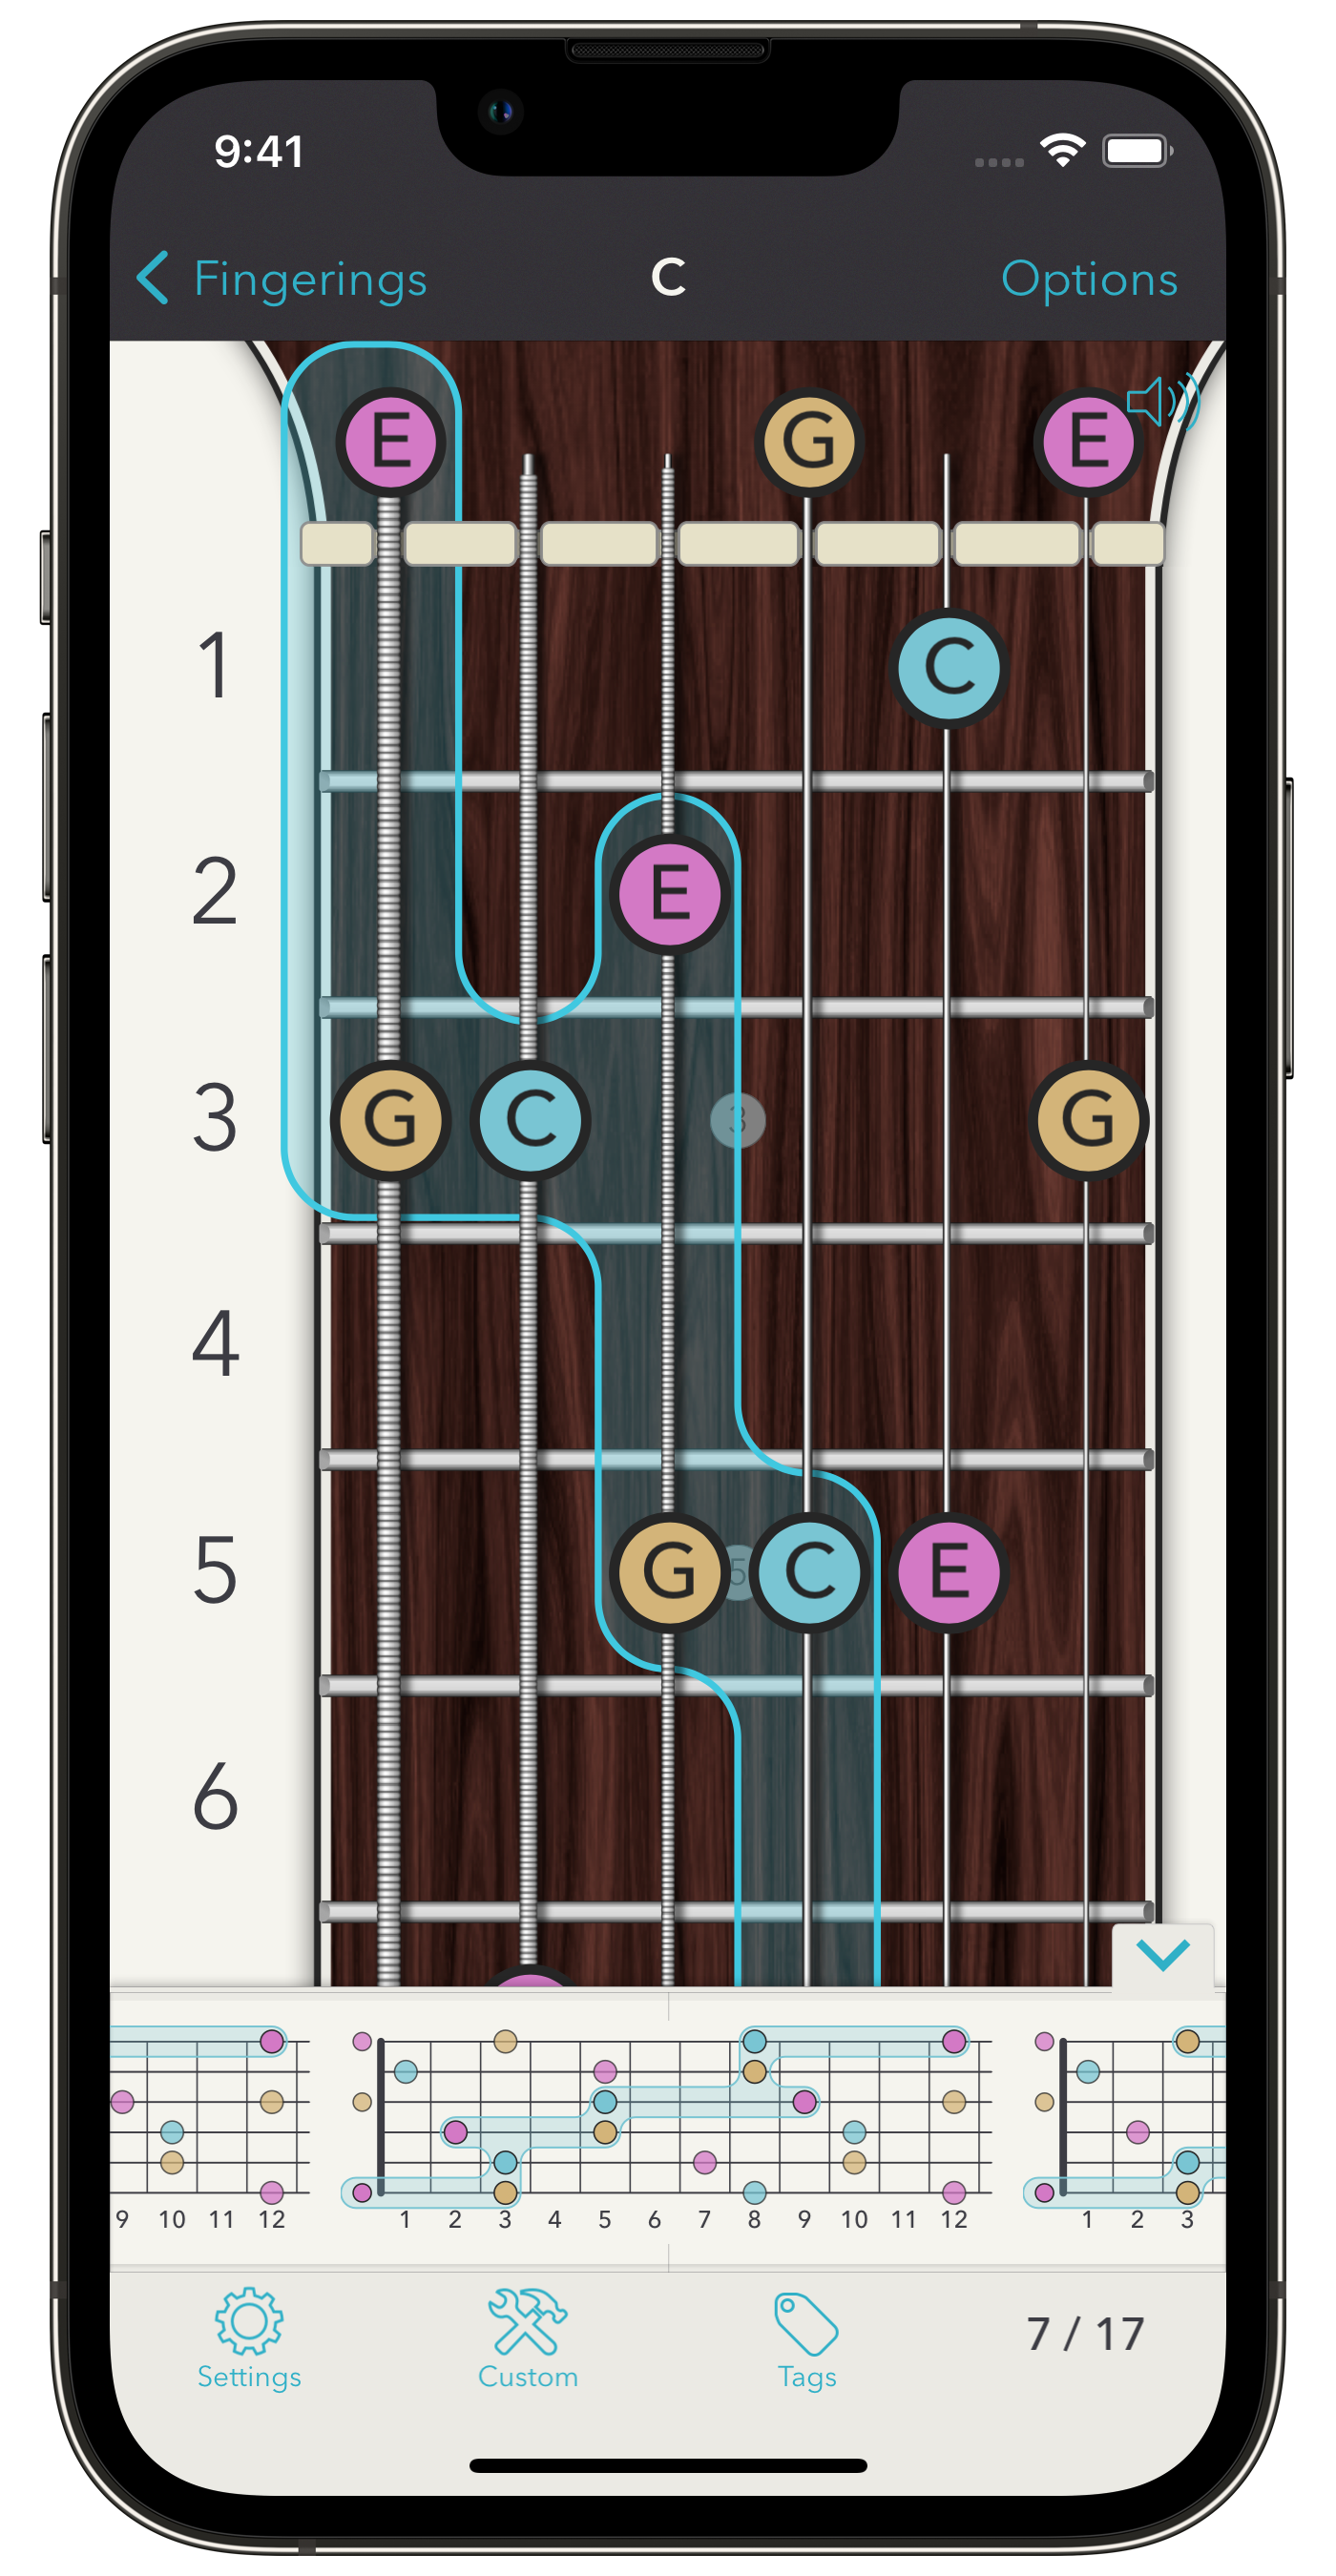
All the views on the fingering screen are touchable and react to each other. You can swipe the main fingering to hear a preview. To its right is a chart corresponding to the dispatch of the fingering notes into intervals. You can quickly see which intervals are more represented, or which ones are missing. If you touch the chart, the corresponding notes on the fingering will highlight and you will hear a preview. On the iPad, you can further see a permutation diagram below the dispatch charts. It shows how the notes from the lowest sounding to the highest are ranked with respect to the intervals. This allows you to identify (but the app does this for you too) special permutations like drop 2 voicings for example. The permutation diagram is touchable too.
The top of the fingering screen corresponds to the “chord” part of the fingering. You can see and touch a star diagram of its intervals. The chord formula is touchable too: it then switches the denomination of intervals from the simplified form like R 3 5 7… to the more precise U M3 P5 m7… (corresponding to “Unison, Major third, Perfect fifth, minor seventh”, etc.).
To finish with this screen, please note that you can change the content of the dots from Notes to Intervals , or Fingers . On the iPhone, you can set that in the Options menu, and directly at the left of the main fingering on the iPad.